Master CPU overclocking to eliminate bottlenecks and boost gaming FPS. Complete guide covering safe techniques, voltage tuning, stress testing, and stability validation for Intel and AMD processors.
unlocking processor performance beyond factory limits
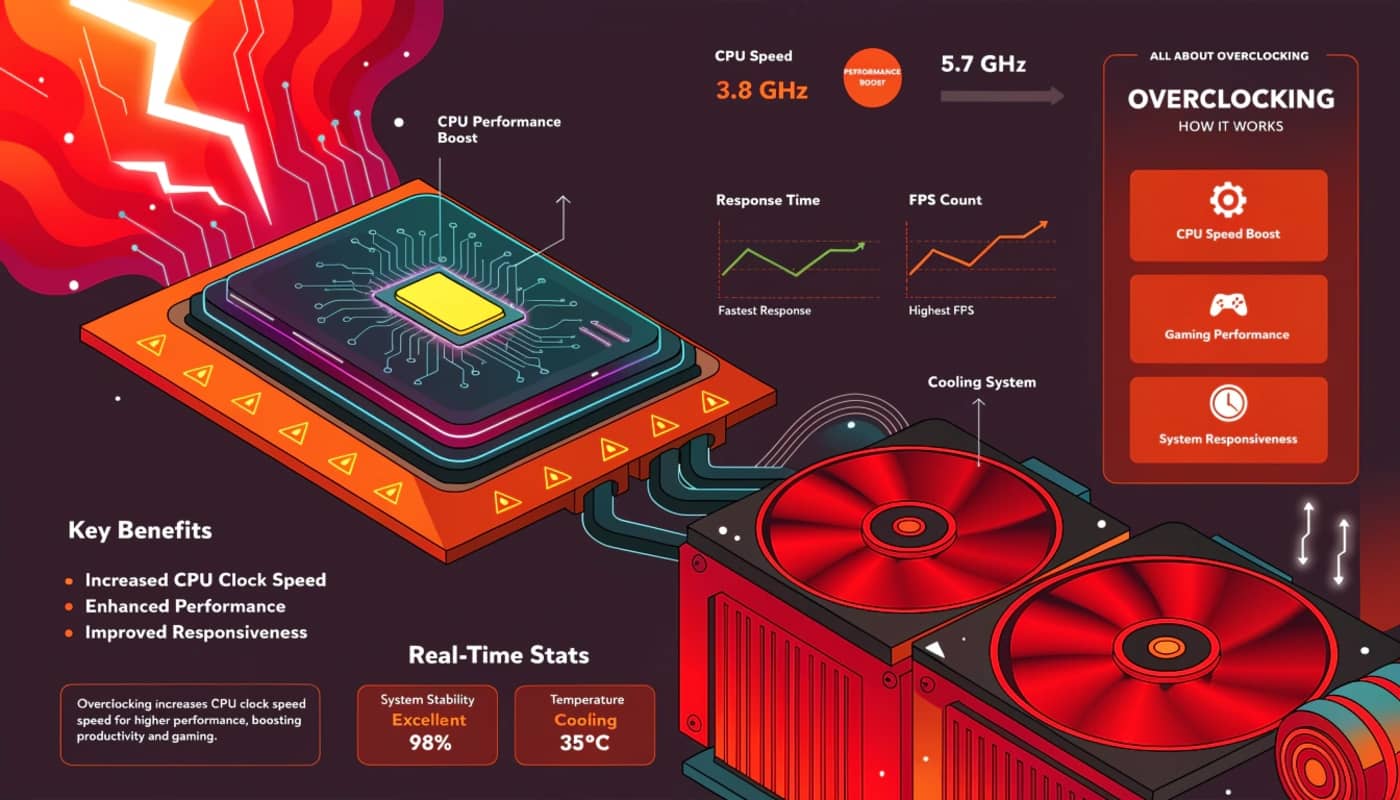
CPU overclocking increases processor frequencies beyond manufacturer specifications, delivering improved gaming performance, faster application responsiveness, and enhanced multitasking capabilities. While GPU overclocking provides the most dramatic FPS improvements in graphics-limited scenarios, CPU overclocking eliminates processor bottlenecks that prevent graphics cards from reaching their full potential. High refresh rate gaming at 144Hz, 240Hz, or 360Hz particularly benefits from overclocked processors since generating hundreds of frames per second creates substantial CPU workloads.
Modern processors ship with conservative frequency specifications ensuring stability across diverse motherboard qualities, cooling solutions, and ambient temperatures. Intel and AMD set base and boost clocks that guarantee reliable operation in budget systems with minimal cooling and premium builds with exotic liquid cooling equally. This universal compatibility approach leaves performance headroom that enthusiasts unlock through careful overclocking, often achieving 500-800 MHz frequency increases representing 15-25% performance improvements.
The competitive gaming landscape increasingly demands high CPU performance as esports titles and multiplayer games prioritize high frame rates over graphical fidelity. Games like CS2, Valorant, Apex Legends, and Fortnite running at competitive settings generate 200-400 FPS on capable systems, creating CPU bottlenecks even with mid-range graphics cards. CPU overclocking ensures processors keep pace with fast GPUs, delivering smooth frame pacing and responsive gameplay that competitive scenarios demand.
CPU overclocking has evolved significantly from requiring jumper settings and hardware modifications to elegant BIOS interfaces offering one-click automatic overclocking and granular manual tuning. Modern processors include extensive thermal protection preventing damage from overheating, voltage limiters preventing dangerous power delivery, and sophisticated boost algorithms that maximize performance within safe parameters. These protections make contemporary CPU overclocking safer than ever while still rewarding enthusiasts who learn advanced techniques.
This comprehensive guide covers CPU overclocking methodology from beginner-friendly approaches through expert-level optimization. You’ll learn how to access BIOS overclocking settings, understand multiplier and base clock relationships, adjust voltages safely, validate stability through comprehensive stress testing, and maintain overclocked configurations for reliable long-term performance during competitive gaming and content creation workloads.
Understanding CPU architecture and frequency fundamentals
Central processing units execute instructions sequentially or through parallel threads, with operating frequency determining how many instruction cycles complete per second. Understanding processor architecture helps explain why CPU overclocking benefits certain gaming scenarios while providing minimal impact in others.
CPU frequency measures in gigahertz representing billions of cycles per second. A processor running 4.0 GHz completes four billion cycles per second. Each cycle allows the CPU to execute instruction steps, with complex instructions requiring multiple cycles. Increasing frequency from 4.0 GHz to 4.8 GHz provides 20% more cycles per second, enabling 20% faster instruction execution assuming no other bottlenecks exist.
Clock multiplier and base clock determine final CPU frequency through simple multiplication. Modern processors use 100 MHz base clocks with adjustable multipliers. A multiplier of 40 yields 4000 MHz or 4.0 GHz. Increasing the multiplier to 48 produces 4800 MHz or 4.8 GHz. Multiplier overclocking provides the cleanest approach since it only affects CPU frequency without impacting other system components tied to base clock.
Turbo boost on Intel processors and precision boost on AMD CPUs automatically overclock under load, increasing frequencies when thermal and power headroom exists. These boost technologies complicate manual overclocking since processors already exceed base specifications during gaming. Effective manual overclocking surpasses automatic boost frequencies, running all cores at speeds higher than single-core turbo while maintaining stability.
Core count and thread count affect overclocking difficulty and cooling requirements. Four-core processors generate less heat than eight-core chips when all cores run at identical frequencies. Overclocking hexa-core and octa-core processors requires more robust cooling solutions since thermal output scales with active core count. Per-core overclocking optimizes individual cores to different frequencies based on silicon quality variance between cores.
Voltage supplies electrical power enabling transistors to switch at specific frequencies. Higher frequencies require more voltage since transistors need additional electrical force to change states faster. The voltage-frequency relationship determines overclocking limits since excessive voltage generates heat that cooling solutions cannot dissipate. Finding minimum voltage for target frequencies balances performance against thermal output.
Thermal design power represents maximum heat generation under stock conditions, guiding cooling solution selection. A 65W TDP processor generates manageable heat with budget tower coolers. A 125W TDP chip requires substantial cooling, with high-end air coolers or liquid cooling necessary for aggressive overclocking. TDP increases significantly when overclocking, often exceeding stock specifications by 30-60W during stress testing.
Architecture differences between Intel and AMD processors affect overclocking approaches and expected results. Intel’s current architectures feature higher single-core boost clocks but sometimes limited all-core overclocking headroom. AMD Ryzen processors offer excellent multi-core overclocking potential but face infinity fabric synchronization considerations when optimizing memory controllers. Understanding architecture-specific characteristics optimizes results for your particular processor.
Essential tools and BIOS navigation for CPU overclocking
CPU overclocking primarily occurs through BIOS configuration rather than Windows software, requiring familiarity with BIOS interfaces and monitoring tools that validate overclock stability and thermal performance.
BIOS access varies by motherboard manufacturer with common entry keys including Delete, F2, F10, or F12 pressed repeatedly during system startup. Modern UEFI BIOS interfaces present graphical menus navigable with mouse and keyboard versus text-only interfaces from older systems. Familiarize yourself with your specific motherboard’s BIOS layout since overclocking options appear under different menu names across manufacturers.
ASUS motherboards place overclocking settings in the AI Tweaker or Extreme Tweaker menu depending on product line. MSI boards use OC or Overclocking sections. Gigabyte motherboards organize options under M.I.T (MB Intelligent Tweaker). ASRock calls their overclocking interface OC Tweaker. Despite naming differences, functionality remains similar across brands with multiplier adjustments, voltage controls, and advanced timing options.
CPU-Z provides real-time monitoring of CPU frequencies, voltages, and specifications within Windows. This free utility displays current clock speeds for each core, applied voltage under load, and validates that BIOS settings actually applied correctly. The benchmark feature offers quick CPU performance testing before and after overclocking for easy comparison.
HWiNFO64 delivers comprehensive hardware monitoring showing temperatures across all CPU cores, various voltage rails, clock speeds, and power consumption. The sensors window displays dozens of metrics with minimum, maximum, and average value tracking. Enable logging functionality to record extended stress test data for analysis of thermal behavior and throttling patterns.
Prime95 represents the standard CPU stress testing application generating maximum processor load through mathematical calculations. Small FFT testing stresses CPU cores maximally while in-place large FFTs test memory controller stability. Blend testing combines both workloads validating complete system stability under mixed loads. Prime95 generates significant heat, quickly revealing cooling inadequacy or voltage instability.
AIDA64 offers comprehensive stress testing with CPU, FPU, cache, and memory stress options. The FPU stress test generates extreme heat useful for validating cooling solutions handle worst-case thermal loads. System stability test runs for hours validating long-term overclock reliability beyond quick benchmark testing.
Cinebench provides CPU rendering benchmarks measuring single-core and multi-core performance. Running Cinebench before and after overclocking quantifies performance gains through standardized workloads. The multi-core test particularly benefits from all-core overclocking showing substantial score improvements from modest frequency increases.
Step-by-step CPU overclocking process for beginners
Successful CPU overclocking follows methodical procedures incrementally increasing frequencies while validating stability at each step. This systematic approach prevents instability and identifies maximum safe overclocks without risking data corruption or hardware stress.
BIOS defaults provide the starting baseline ensuring clean slate before applying overclocks. Enter BIOS and load optimized defaults or fail-safe defaults depending on manufacturer terminology. This reset eliminates previous setting attempts ensuring you start from known-good configuration. Save and exit BIOS, boot into Windows, and establish baseline performance running Cinebench or Prime95 recording default performance metrics.
Cooling verification ensures your thermal solution handles stock loads before adding overclocking thermal output. Run Prime95 small FFT test for 10 minutes monitoring temperatures with HWiNFO64. CPU temperatures should remain below 80°C at stock settings. If temperatures exceed 85°C at stock, improve cooling before attempting overclocking. Quality tower air coolers or 240mm+ liquid coolers provide adequate thermal headroom for moderate overclocking.
BIOS profile saving preserves working configurations before experimentation. Most motherboards offer save/load profile functionality storing complete BIOS settings. Save your stock configuration in profile slot 1 providing quick restoration if overclocking attempts fail. Create additional profiles as you achieve stable overclocks at various frequencies, enabling rapid switching between conservative and aggressive settings.
Multiplier overclocking starts by disabling automatic boost technologies to take manual control. Find CPU boost or turbo settings in BIOS and disable them, preventing automatic frequency scaling from interfering with manual settings. Locate the CPU multiplier or CPU ratio setting showing current value like 38 for 3.8 GHz. Increase multiplier by 2-3, representing 200-300 MHz frequency gain.
Conservative voltage increases accompany frequency gains ensuring stability at higher speeds. Stock CPU voltage typically ranges 1.15V to 1.35V depending on processor model. Begin with 1.30V for initial overclocking attempts on most modern processors. This conservative voltage provides stability headroom for moderate overclocks without excessive heat generation or degradation risk.
Save and boot with new settings testing basic stability. If the system boots successfully to Windows, overclock applied correctly. Run CPU-Z verifying displayed frequency matches your intended overclock. Stress test with Prime95 small FFT for 10 minutes observing temperatures and watching for crashes. Successful 10-minute runs indicate preliminary stability warranting continued testing.
Incremental increases continue testing process raising multiplier by 1-2 at each step. After confirming stability at initial overclock, increase multiplier again by 1-2 representing another 100-200 MHz gain. Reboot, stress test for 10 minutes, and verify continued stability. Continue this pattern until system crashes during boot or fails stress testing.
Maximum stable frequency identification occurs when instability appears. When crashes occur during boot or stress testing, the previous stable frequency becomes your baseline maximum overclock at current voltage. Reduce multiplier by 1-2 from the unstable setting establishing conservative stable configuration requiring extended validation testing.
Extended stress testing validates overclock reliability over hours rather than minutes. Run Prime95 for at least 2 hours monitoring temperatures staying below 85°C ideally. Follow with AIDA64 stress test for another 2 hours. Complete validation requires gaming sessions running demanding titles for 3-4 hours ensuring stability under real-world workloads versus synthetic benchmarks.
Voltage optimization reduces power consumption and heat generation while maintaining overclock stability. After establishing stable frequency, incrementally reduce voltage by 10-20mV steps retesting stability at each reduction. Find minimum voltage sustaining stable overclock, balancing performance against thermal output and long-term component health.
Advanced CPU overclocking: voltage tuning and per-core optimization
Beyond basic multiplier adjustments, advanced techniques extract maximum performance through precise voltage control, load line calibration, and per-core frequency optimization that accounts for silicon quality variance across individual cores.
Core voltage represents the primary voltage rail powering CPU cores, labeled as Vcore in BIOS. Stock voltages vary by processor with modern chips running 1.15V to 1.35V depending on frequency and load. Overclocking typically requires 1.30V to 1.45V with exact requirements varying by CPU architecture and silicon lottery. Each generation has safe voltage limits requiring research specific to your processor.
Load line calibration compensates for voltage droop under load where delivered voltage drops below configured voltage. When CPU transitions from idle to full load, resistance in power delivery causes voltage sag. LLC settings range from low to extreme with moderate levels recommended for most overclocking. Level 4 or 5 on typical 8-level scales provides good balance preventing excessive droop without dangerous voltage overshoot.
Testing voltage droop reveals whether LLC adjustment improves stability. Monitor Vcore using HWiNFO64 during idle and under Prime95 load. If idle voltage shows 1.350V but drops to 1.280V under load, excessive droop exists requiring LLC increases. Ideal LLC maintains voltage within 20-30mV of target under load without overshooting target voltage during idle periods.
AVX offset prevents instability during AVX instruction workloads generating higher power consumption and heat than standard instructions. Some workloads including certain stress tests use AVX instructions causing thermal throttling or instability at frequencies stable for non-AVX loads. Setting negative AVX offset reduces frequency by specified amount during AVX workload, maintaining stability. Typical AVX offsets range from -1 to -3 representing 100-300 MHz frequency reduction.
Per-core overclocking maximizes total performance by pushing better cores to higher frequencies while maintaining weaker cores at conservative speeds. Access per-core multiplier settings in BIOS showing individual multiplier controls for each core. Test each core individually with Core Cycler or similar tools identifying which cores achieve highest stable frequencies.
Core quality testing methodology involves isolating individual cores using affinity settings then stress testing at progressively higher frequencies. Core Cycler automates this process testing each core sequentially. Strong cores might reach 5.2 GHz while weaker cores stabilize at 4.9 GHz. Configure per-core multipliers accordingly maximizing performance within each core’s capabilities.
P-core and E-core configuration on Intel 12th gen and newer processors requires separate optimization. Performance cores (P-cores) handle demanding single-threaded and gaming workloads benefiting from aggressive overclocking. Efficiency cores (E-cores) manage background tasks and multi-threaded workloads. Focus overclocking efforts on P-cores for gaming performance with conservative E-core settings maintaining system stability.
Ring ratio or cache ratio controls uncore frequency affecting L3 cache performance. Higher ring ratios reduce latency improving gaming performance in cache-sensitive titles. Start with ring ratio matching your all-core overclock frequency. If instability occurs, reduce ring ratio by 2-4 multipliers. Some chips handle ring ratios exceeding core frequencies while others require lower ring settings for stability.
BCLK overclocking modifies base clock frequency affecting CPU, memory controller, and PCIe buses simultaneously. This advanced technique provides additional frequency headroom beyond multiplier limits but requires careful attention to system-wide effects. Small BCLK increases of 2-5 MHz combined with multiplier reductions sometimes achieve higher final frequencies. BCLK overclocking risks instability in storage controllers and peripherals sensitive to reference clock changes.
Voltage limits vary by processor architecture requiring research into safe maximums. Intel processors generally handle 1.35V to 1.45V for daily overclocking depending on generation. AMD Ryzen chips typically run 1.30V to 1.40V safely with newer generations tolerating slightly higher voltages. Exceeding manufacturer recommendations accelerates degradation potentially reducing processor lifespan from decades to years.
Stress testing and stability validation methodologies
Comprehensive stress testing distinguishes stable overclocks from configurations that crash during critical gaming moments or cause data corruption through memory errors. Multiple testing approaches validate different aspects of overclock stability.
Prime95 small FFT testing stresses CPU cores maximally generating peak thermal output. This torture test validates cooling adequacy and core voltage stability under worst-case loads exceeding typical gaming scenarios. Run small FFT for 1-2 hours initially, extending to 8+ hours for absolute confidence in stability. Modern AVX instructions in Prime95 generate extreme heat sometimes requiring AVX offsets or reduced frequencies.
Large FFT testing validates memory controller stability alongside CPU core testing. This workload stresses the memory subsystem ensuring memory controller overclocking doesn’t cause errors. Large FFT generates less heat than small FFT allowing longer testing sessions validating stability over thermal saturation periods. Run large FFT for 4-8 hours after validating short-term stability with small FFT.
Blend testing in Prime95 combines CPU and memory stress validating complete system stability. This mixed workload represents realistic usage patterns better than pure CPU or memory tests. Successful 12-24 hour blend runs provide high confidence in overclock reliability for extended gaming sessions or productivity workloads.
AIDA64 system stability test offers alternative validation stressing CPU, FPU, cache, and memory simultaneously. Some overclockers prefer AIDA64 over Prime95 since it generates slightly less extreme thermal loads while still validating stability. The FPU stress component creates significant heat revealing cooling inadequacies. Run AIDA64 for 4-8 hours confirming stability across test components.
OCCT provides targeted stress testing with customizable workload patterns. CPU test modes include automatic mode cycling through different instruction sets, and linpack mode generating extreme heat through dense mathematical calculations. The variable load option tests stability during frequency transitions catching instability missed by constant load testing. OCCT’s error detection catches subtle instability preventing data corruption.
Linpack testing through Intel Linpack or LinX generates maximum possible CPU power consumption and heat. This extreme stress test exceeds realistic workloads but validates cooling handles worst-case scenarios. Linpack particularly useful for validating high-end cooling solutions before attempting aggressive overclocks. Run Linpack for 30-60 minutes verifying temperatures remain below thermal throttling thresholds.
Real-world gaming testing supplements synthetic stress tests validating stability under actual gaming workloads. Play demanding CPU-intensive titles like Microsoft Flight Simulator, Cyberpunk 2077, or multiplayer games with high player counts for 3-4 hours. Monitor CPU temperatures, clock speeds, and watch for crashes or freezes. Some games trigger instability that stress tests miss due to different instruction patterns.
Encoding workloads provide productive stress testing rendering videos or compressing files while validating stability. Handbrake video transcoding or 7-Zip compression benchmarks stress all CPU cores for extended periods. These workloads serve dual purposes testing stability while accomplishing useful work. Successful multi-hour encoding sessions indicate robust overclock stability.
Memory testing with MemTest86 or TestMem5 validates that CPU memory controller overclocking doesn’t cause RAM errors. CPU overclocking affects memory controller frequency and stability requiring dedicated memory validation. Run TestMem5 with anta777 extreme config for 3-6 cycles ensuring zero errors before considering overclock stable.
Temperature monitoring throughout testing ensures cooling adequacy for sustained loads. CPU temperatures should remain below 85°C during heavy stress testing with gaming loads staying around 70-80°C maximum. Sustained temperatures above 90°C indicate cooling inadequacy requiring better thermal solutions before attempting higher overclocks. Modern CPUs throttle automatically preventing damage but reducing performance.
Intel CPU overclocking: architecture-specific techniques
Intel processors across different generations require architecture-specific overclocking approaches accounting for voltage behavior, thermal characteristics, and boost algorithm variations.
12th gen Alder Lake and 13th gen Raptor Lake feature hybrid architectures with P-cores and E-cores requiring differentiated overclocking strategies. Focus on P-core overclocking for gaming performance since games primarily utilize performance cores. E-cores can run at conservative frequencies or be disabled entirely in BIOS for maximum gaming optimization. Some users achieve better gaming results with E-cores disabled reducing scheduling complexity.
Ring ratio optimization on Intel platforms affects L3 cache performance impacting gaming and application responsiveness. Start with ring ratio matching P-core frequency. If instability occurs during stress testing, reduce ring ratio by 2-3 multipliers. Some chips handle ring ratios 100-300 MHz above core frequencies while others require lower ring settings. Gaming performance particularly benefits from high ring ratios reducing cache access latency.
Intel voltage behavior requires understanding of VID versus Vcore relationships. Voltage ID represents requested voltage while Vcore shows actual delivered voltage after load line calibration effects. Configure voltages in BIOS watching delivered Vcore under load using HWiNFO64 ensuring target voltage actually reaches CPU cores. Discrepancies between configured and delivered voltage explain apparent stability issues.
TVB (Thermal Velocity Boost) and ABT (Adaptive Boost Technology) represent Intel boost enhancements providing automatic overclocking when thermal headroom exists. These technologies can complement or conflict with manual overclocking. Experiment with enabling or disabling these features comparing performance and stability. Some manual overclocks benefit from disabled automatic features while others work synergistically.
10th gen Comet Lake and 11th gen Rocket Lake overclocking faces thermal challenges from high power consumption. These architectures generate significant heat requiring robust cooling for all-core overclocks. Conservative all-core frequencies of 4.8-5.0 GHz often prove more thermally manageable than aggressive 5.2+ GHz attempts. Undervolting combined with moderate overclocking sometimes provides better results than maximum frequencies at high voltages.
Older Intel platforms including 8th and 9th generation processors offer excellent overclocking headroom with mature BIOS support. These chips commonly achieve 5.0+ GHz all-core overclocks with good cooling. Mature platform development means extensive community knowledge about optimal settings and voltage requirements specific to each processor model.
AMD CPU overclocking: Ryzen-specific optimization
AMD Ryzen processors feature architecture characteristics requiring different overclocking approaches compared to Intel chips, particularly regarding infinity fabric synchronization and voltage behavior.
Precision Boost Override provides automatic overclocking enhancement on AMD platforms, raising boost frequency limits and power delivery thresholds. Enable PBO in BIOS as first overclocking step, often providing 100-200 MHz frequency gains without manual tuning. PBO sometimes outperforms manual all-core overclocks for gaming by allowing aggressive single-core and dual-core boost behavior.
Curve Optimizer represents advanced AMD overclocking reducing voltage at specific frequencies improving efficiency and thermals. Negative curve optimizer values enable higher boost clocks by reducing temperatures. Start with -10 on all cores testing stability, then increase to -15 or -20 gradually. Individual core curve optimization extracts maximum performance by tuning each core’s voltage curve independently.
Infinity fabric overclocking directly impacts Ryzen performance since fabric interconnects link CPU chiplets and memory controllers. FCLK (fabric clock) should ideally match memory clock divided by two for synchronized 1:1 operation. 3600 MHz memory requires 1800 MHz FCLK. Mismatched ratios introduce latency penalties hurting gaming performance. Test FCLK stability independently since not all chips handle high fabric frequencies.
Memory controller integrated in Ryzen processors means memory overclocking and CPU overclocking intertwine. Higher CPU voltage sometimes enables higher memory frequencies through improved memory controller stability. Optimize CPU voltage and frequency before attempting aggressive memory overclocking since stable CPU improves memory overclocking success rates.
AMD voltage specifications differ from Intel with safe daily voltages around 1.25V to 1.35V for manual all-core overclocks on Zen 3. Higher voltages accelerate electromigration and degradation on Ryzen architecture. Conservative voltage approaches using PBO and curve optimizer often provide better performance and longevity than aggressive manual voltage overclocking.
Ryzen Master software enables Windows-based overclocking and monitoring for AMD processors. This utility provides alternative to BIOS overclocking with profile saving and real-time adjustments. Ryzen Master particularly useful for testing different configurations quickly before finalizing settings in BIOS. Profiles created in Ryzen Master translate to BIOS settings for permanent application.
CCX and CCD organization on Ryzen processors affects per-core overclocking strategies. Each core complex or core chiplet contains multiple cores sharing cache. Understanding your processor’s core topology helps identify which cores reside on the same CCX enabling strategic overclocking of strongest CCX to highest frequencies while maintaining conservative settings on weaker CCX.
Frequently asked questions about CPU overclocking
Will CPU overclocking void my warranty?
Intel and AMD warranties technically prohibit overclocking but practically enforcement is minimal. Warranty claims rarely get denied for overclocking unless physical damage occurs. Many enthusiast processors are marketed specifically for overclocking, and manufacturers understand enthusiast users overclock despite warranty language.
How much gaming performance gain does CPU overclocking provide?
Gaming performance gains vary dramatically based on game engine and GPU pairing. CPU-limited scenarios at 1080p with high-end GPUs see 10-25% FPS improvements. GPU-limited scenarios at 4K show minimal gains. High refresh rate gaming at 144Hz+ benefits most from CPU overclocking with gains of 20-40 FPS common in competitive titles.
Is CPU overclocking safe for daily use?
Yes, when using appropriate voltages and cooling. Conservative overclocks with voltages within manufacturer specifications present minimal degradation risk. Modern processors include thermal protection, current limits, and voltage safeguards preventing catastrophic failures. Processors typically become obsolete before overclocking-related wear becomes relevant.
What cooling do I need for CPU overclocking?
Moderate overclocking requires quality tower air coolers like Noctua NH-D15 or be quiet! Dark Rock Pro 4. Aggressive overclocking benefits from 240mm+ AIO liquid coolers or custom liquid cooling loops. Stock coolers included with processors rarely handle overclocking thermal output adequately.
Should I overclock all cores or use per-core settings?
All-core overclocking provides simplicity and consistent behavior across workloads. Per-core optimization extracts maximum performance by pushing best cores higher. For gaming, focus on optimizing cores 0-3 which games primarily utilize. Content creators benefit from all-core overclocking maximizing multi-threaded rendering performance.
Can I overclock locked Intel processors?
Intel locks non-K processors preventing multiplier overclocking. Some motherboards supported BCLK overclocking on locked chips but Intel microcode updates closed these loopholes. Purchase K-series processors if overclocking is priority since locked processors offer minimal overclocking potential.
Does CPU overclocking increase power consumption significantly?
Overclocked CPUs draw 30-80W more power under load compared to stock configurations. For typical gaming usage, this adds approximately $3-10 monthly to electricity costs. The performance improvement justifies minimal power cost increase for most enthusiasts pursuing maximum gaming performance.
How long does CPU overclocking stability testing take?
Initial stability requires 2-4 hours of stress testing. High confidence stability demands 8-12 hours Prime95 or AIDA64 testing plus extended gaming sessions. Some overclockers run 24-48 hour stress tests for absolute certainty before considering overclocks production-ready for critical workloads.
maximizing processor performance through strategic overclocking
CPU overclocking eliminates processor bottlenecks enabling graphics cards to reach their full potential while improving system responsiveness across gaming and productivity workloads. The methodical approach of incremental frequency increases, voltage optimization, and comprehensive stability testing ensures overclocked processors deliver reliable performance improvements rather than unstable systems prone to crashes.
Understanding architecture-specific characteristics between Intel and AMD platforms enables optimized overclocking strategies tailored to each processor’s strengths and limitations. Intel chips benefit from aggressive all-core overclocking while AMD Ryzen processors often perform better with PBO and curve optimizer approaches that maintain boost behavior flexibility.
Modern BIOS interfaces and comprehensive monitoring tools democratize CPU overclocking, making advanced tuning accessible to enthusiasts willing to invest time learning proper procedures. The safety features built into current processors prevent catastrophic failures from reasonable overclocking attempts while still rewarding careful tuning with substantial performance gains.
CPU overclocking complements GPU optimization and software tweaking creating comprehensive performance profiles that maximize gaming systems at hardware and software levels simultaneously. Combined with graphics card overclocking, memory tuning, and operating system optimization, overclocked processors contribute to complete gaming platforms optimized for competitive performance where every frame and millisecond matters.