Learn GPU overclocking step-by-step to boost FPS by 15-25%. Complete guide covering MSI Afterburner, stress testing, cooling optimization, and stable overclock validation for gaming.
unlocking your graphics card’s hidden performance
Graphics card overclocking represents the single most impactful hardware modification for gaming performance. While CPU overclocks help in processor-limited scenarios and memory tuning reduces latency, GPU overclocking directly increases frame rendering speed across virtually every game. A 15% GPU overclock translates almost directly to 15% higher frame rates, making it the most efficient performance-per-effort optimization available to PC gamers.
Modern graphics cards ship with conservative factory settings that prioritize compatibility and longevity across diverse systems and environments. Manufacturers set base and boost clocks that guarantee stability in hot cases with poor airflow, in regions with high ambient temperatures, and across the natural variance between individual chips. This conservative approach leaves significant performance headroom that proper overclocking unlocks without exceeding safe operating parameters.
The performance gap between stock and overclocked graphics cards often represents 200-400 MHz frequency difference, translating to 10-25% FPS improvements depending on game engine characteristics and existing system bottlenecks. A graphics card running 1800 MHz stock might achieve stable 2100 MHz overclocks with proper tuning. This 300 MHz gain costs nothing beyond the time invested learning overclocking techniques, providing equivalent performance to upgrading to the next tier graphics card costing hundreds of dollars more.
GPU overclocking has evolved from risky modifications requiring hardware voltage modifications to safe software-based tuning using intuitive interfaces. Modern overclocking tools like MSI Afterburner provide real-time monitoring, automatic safety limits, and one-click reversion to stock settings. The combination of user-friendly software and extensive hardware protections built into current graphics cards makes overclocking accessible to enthusiasts of all experience levels.
This comprehensive guide covers every aspect of safe GPU overclocking from initial setup through stability validation. You’ll learn how to use MSI Afterburner effectively, understand the relationship between core clocks and memory speeds, optimize power limits and fan curves, validate stability through proper stress testing, and maintain overclocked configurations for reliable long-term gaming performance.
Understanding GPU architecture and overclocking principles
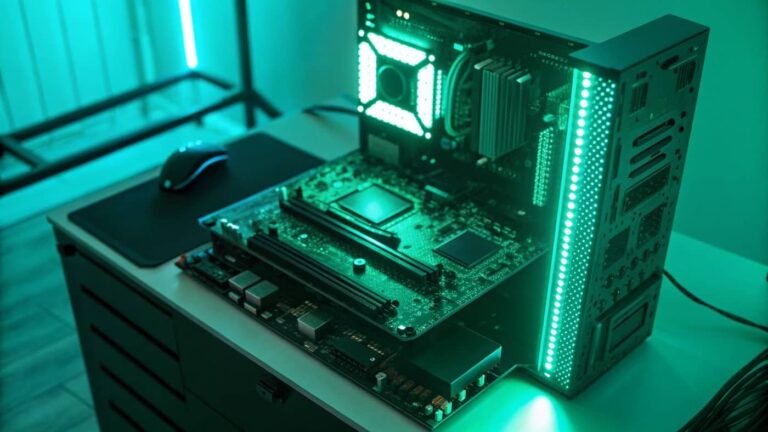
Graphics processing units consist of thousands of small processing cores working in parallel to render frames. Unlike CPUs with fewer high-performance cores, GPUs prioritize massive parallelism with simpler individual cores optimized for graphics calculations. Understanding this architecture helps explain why GPU overclocking provides such dramatic gaming improvements compared to other component optimizations.
GPU core clock determines how many processing cycles per second the graphics processor completes. Modern cards operate in the 1500-2500 MHz range depending on model and manufacturer. Each MHz increase allows slightly more calculations per second, directly scaling rendering performance. The relationship between core clock and frame rates approaches linearity in GPU-limited scenarios where graphics processing represents the primary bottleneck.
Boost clock behavior complicates simple frequency specifications since modern GPUs dynamically adjust speeds based on temperature, power consumption, and workload demands. A card rated for 1800 MHz base clock might boost to 1950 MHz during light gaming, 1900 MHz during demanding titles, and throttle to 1850 MHz when thermal limits approach. Understanding boost behavior helps set realistic overclocking expectations and identify thermal bottlenecks limiting performance.
Memory clock controls VRAM operating frequency determining how quickly the GPU accesses texture data, frame buffers, and other graphical assets. Memory speeds range from 12 Gbps to 24 Gbps on current generation cards, with faster memory enabling higher resolution textures and smoother asset streaming. Memory overclocking provides smaller performance gains than core overclocking, typically 2-5% FPS improvements, but eliminates stuttering in memory-bandwidth-limited scenarios.
Power limit restrictions prevent graphics cards from drawing excessive current that could damage voltage regulation components or exceed power supply capabilities. Manufacturers set conservative power limits ensuring cards work safely in systems with minimum-specification power supplies. Increasing power limits allows sustained high clock speeds during demanding gaming rather than throttling to stay within restrictive power budgets.
Thermal throttling reduces GPU clocks automatically when temperatures exceed safe operating limits, typically around 83-87°C depending on card model. Even with unlimited power available, inadequate cooling causes frequency reductions to prevent thermal damage. Understanding thermal throttling helps diagnose why some overclocks don’t deliver expected performance gains despite appearing stable in short tests.
Voltage controls electrical power supplied to GPU cores enabling higher frequencies at the cost of increased heat generation and power consumption. Stock voltages typically fall between 0.950V and 1.100V depending on clock speeds and boost behavior. Voltage adjustments remain optional for many overclocks since most cards achieve decent frequency gains on stock voltage, with manual voltage tuning reserved for pushing maximum overclocks.
Silicon lottery describes performance variance between individual GPU chips from identical production runs. Two graphics cards with identical model numbers might overclock to 2100 MHz and 1950 MHz respectively due to microscopic manufacturing differences affecting transistor quality. This natural variance means your specific card’s overclocking potential differs from others’ results online, making personal testing essential rather than assuming identical performance.
Essential tools and software for GPU overclocking
Successful GPU overclocking requires proper software tools for adjusting settings, monitoring performance, and validating stability. These applications provide the interfaces and data necessary to overclock safely while tracking temperatures, voltages, and clock speeds in real-time.
MSI Afterburner represents the industry standard GPU overclocking utility supporting NVIDIA, AMD, and Intel graphics cards through a unified interface. Despite the MSI branding, Afterburner works with graphics cards from all manufacturers including ASUS, EVGA, Gigabyte, and others. Download the latest version from MSI’s official website, declining any bundled software offers during installation to avoid unnecessary bloatware.
The Afterburner interface displays several adjustment sliders controlling key overclocking parameters. Core clock offset adjusts GPU frequency in positive or negative MHz increments from stock speeds. Memory clock offset modifies VRAM frequency similarly. Power limit slider increases maximum power draw percentage allowing sustained boost clocks. Temperature limit adjusts thermal throttling threshold. Fan speed controls cooling performance manually or through custom curves.
RivaTuner Statistics Server installs alongside Afterburner providing on-screen display functionality showing real-time FPS, temperatures, clock speeds, and other metrics during gaming. This overlay helps monitor overclock behavior without alt-tabbing to separate monitoring windows. Configure RTSS to display GPU temperature, core clock, memory clock, GPU utilization percentage, and frame rate for comprehensive performance tracking.
GPU-Z provides detailed information about graphics card specifications, sensors, and current operating state. This diagnostic tool identifies exact GPU model, memory type, BIOS version, and current clock speeds. The sensors tab displays real-time monitoring of multiple temperature sensors, voltage rails, and clock frequencies. GPU-Z helps verify overclock settings actually applied correctly and identifies potential hardware bottlenecks.
Heaven benchmark and 3DMark serve as standard GPU stress testing and benchmarking tools. Unigine Heaven provides a free looping benchmark that pushes graphics cards with demanding rendering while displaying frame rates and temperatures. 3DMark offers more comprehensive testing including DirectX 12 and ray tracing workloads. These benchmarks establish baseline performance and validate overclock stability through repeated stress testing.
FurMark represents an extreme stress testing tool generating maximum possible GPU load through aggressive fur rendering algorithms. This torture test produces higher temperatures and power consumption than actual gaming, making it useful for worst-case stability validation. Use FurMark cautiously since prolonged testing at maximum load can stress components more than typical usage scenarios warrant.
HWiNFO64 provides comprehensive system monitoring beyond GPU-specific tools, tracking CPU temperatures, motherboard sensors, memory usage, and storage temperatures. The detailed sensor data helps identify system-wide thermal issues that might affect GPU cooling performance. HWiNFO’s logging functionality records performance data over extended periods enabling analysis of thermal throttling patterns.
Step-by-step GPU overclocking methodology
Proper overclocking follows systematic procedures that incrementally increase performance while continuously validating stability. This methodical approach prevents crashes, identifies maximum stable frequencies, and ensures reliable long-term operation during competitive gaming sessions.
Baseline performance testing establishes reference metrics before applying any overclocks. Launch MSI Afterburner and verify all sliders sit at default positions with zero offsets applied. Run Heaven benchmark for 10 minutes recording average FPS, maximum temperature, and maximum GPU clock speed achieved during the test. Screenshot these results or write them down for later comparison. Test your most-played games similarly recording FPS and temperatures during typical gameplay scenarios.
Driver updates should be current before beginning overclocking since GPU driver versions significantly affect performance and stability. Visit NVIDIA or AMD’s website downloading the latest Game Ready or Adrenalin drivers respectively. Perform a clean driver installation using DDU (Display Driver Uninstaller) if experiencing any graphics issues or if previous overclocks became unstable. Fresh drivers eliminate software variables that might complicate overclocking efforts.
Power limit increases represent the safest first overclocking step providing immediate performance gains. In MSI Afterburner, slide the power limit slider to maximum, typically 110-120% depending on card model. This change alone often yields 5-10% performance improvements by allowing the GPU to maintain boost clocks longer before throttling. Click the checkmark to apply settings, then rerun benchmarks measuring the performance gain from increased power limit alone.
Fan curve optimization prepares cooling for increased thermal loads from overclocking. Click Afterburner’s fan speed button opening the fan curve editor. Create an aggressive curve where fans reach 60% speed at 60°C, 75% at 70°C, and 85-90% at 75°C. This ensures adequate cooling headroom for overclocking while keeping temperatures well below throttling thresholds. Balance noise tolerance against cooling performance based on whether you wear headphones during gaming.
Core clock overclocking increases GPU processing frequency for direct performance scaling. Start conservatively with a +50 MHz core clock offset. Apply the setting and run Heaven benchmark for 5-10 minutes watching for crashes, visual artifacts, or driver resets. If stable, increase core clock by another 50 MHz and repeat testing. Continue this process in 25-50 MHz increments until instability appears.
Instability indicators include application crashes, driver crashes requiring reset, black screens, colored artifacts appearing on screen, or GPU temperature spikes suggesting thermal throttling. When any instability occurs, reduce core clock by 50 MHz from the unstable setting. This becomes your preliminary maximum core overclock requiring further validation through extended testing.
Memory clock overclocking follows similar incremental methodology but uses larger steps due to different stability characteristics. Start with a +100 MHz memory offset, test for stability, then increase in 100 MHz increments. Memory overclocking produces smaller FPS gains than core overclocking, typically 2-5%, but improves frame time consistency and reduces stuttering in memory-intensive games.
Memory artifacts manifest differently than core instability, appearing as small colored squares or pixels, texture flickering, or corrupted geometry. These visual glitches indicate memory overclocking exceeded stable limits. When memory artifacts appear, reduce memory clock by 200 MHz establishing conservative stable frequency. Memory stability proves more sensitive to temperature than core stability, with artifacts sometimes appearing after prolonged gaming sessions heat-soak VRAM chips.
Combined testing validates that core and memory overclocks remain stable when both applied simultaneously. Some combinations that test stable individually become unstable together due to increased total power draw or thermal output. After establishing individual maximums, apply both overclocks together running extended stress tests. If instability emerges, slightly reduce both clocks finding the optimal balance.
Stress testing duration determines overclock reliability for long gaming sessions. Initial 10-minute tests catch obvious instability but extended testing reveals problems that emerge after thermal saturation. Run FurMark for 30 minutes observing maximum temperatures and watching for any crashes or artifacts. Follow with 3DMark stress test completing at least 20 benchmark loops. Finally, play demanding games for 2-3 hours confirming real-world stability.
Profile saving in MSI Afterburner preserves successful overclock configurations. After validating stable settings, click the save icon selecting a profile number. Saved profiles enable quick switching between stock settings, moderate overclocks, and maximum overclocks depending on game demands. The apply at startup option automatically loads your preferred overclock when Windows boots, though some prefer manual application to avoid potential boot issues.
Advanced GPU overclocking techniques
Beyond basic frequency increases, advanced techniques extract additional performance through voltage tuning, curve optimization, and specialized cooling management. These expert-level approaches squeeze final percentages from GPU hardware but require deeper understanding of voltage-frequency relationships and thermal management principles.
Voltage-frequency curve editing provides finer control than simple offset adjustments by setting specific voltages for target frequencies. Press Ctrl+F in MSI Afterburner opening the voltage-frequency curve editor. This graph displays voltage on the horizontal axis and frequency on the vertical axis with dots representing operating points. Drag individual points upward to increase frequency at specific voltages or flatten the curve for undervolting.
Undervolting reduces power consumption and temperatures while maintaining or minimally reducing performance. Select the voltage point representing your desired operating voltage, drag it upward to your target frequency, then flatten all points to the right to this same frequency. This forces the GPU to run at your target frequency using lower voltage than stock behavior. Undervolting 50-100mV typically reduces temperatures 5-10°C while losing only 2-3% performance.
Overvolting enables pushing higher frequencies beyond what stock voltage supports. Unlock voltage control in Afterburner settings then increase core voltage by 10-20mV increments. Higher voltage generates significantly more heat requiring excellent cooling solutions. Monitor temperatures carefully ensuring they stay below 80°C under sustained loads. Most consumer overclocking stays within 50-100mV above stock voltage for safety and thermal management.
Per-voltage-point tuning extracts maximum performance by optimizing the entire voltage-frequency curve rather than applying uniform offsets. Test each voltage point individually finding the highest stable frequency at that voltage. This tedious process maximizes performance across the full voltage range but requires hours of testing to validate stability at each operating point. The result provides the absolute maximum performance your specific GPU silicon can achieve.
VRAM thermal pad modification improves memory cooling on cards where stock thermal pad thickness or quality limits memory overclocking. Disassembling graphics cards voids warranties and requires technical skill, but replacing thermal pads with higher quality alternatives like Gelid Extreme or Thermalright Odyssey can reduce memory temperatures 10-15°C. Lower memory temperatures enable higher stable memory overclocks particularly on GDDR6X cards that run hot.
Liquid cooling through AIO GPU brackets or full custom loops dramatically improves thermal headroom enabling more aggressive overclocks. Air-cooled cards typically throttle around 75-80°C while liquid-cooled GPUs maintain 50-60°C under load. This 20°C temperature difference allows 100-200 MHz higher stable overclocks. However, liquid cooling costs $100-300+ for quality solutions, requiring cost-benefit analysis against the performance gained.
BIOS flashing with modified firmware removes power limits and voltage restrictions imposed by manufacturers. Custom BIOS files available through overclocking forums increase power limits to 150%+ and unlock higher voltage ceilings. BIOS flashing carries significant risk including potential hardware bricking if power delivery can’t handle increased loads. This extreme technique suits only experienced overclockers with adequate cooling and power delivery infrastructure.
Power supply considerations affect GPU overclocking stability since insufficient PSU capacity causes crashes under heavy GPU loads. An overclocked high-end GPU might draw 350-400W during stress testing compared to 250-300W stock. Ensure your power supply provides adequate capacity with quality 12V rails rated for your GPU’s overclocked power consumption plus 30% headroom for system stability.
Monitoring and maintaining GPU overclocks
Successful long-term GPU overclocking requires ongoing monitoring ensuring settings remain stable across different games, ambient temperature changes, and driver updates. Establishing maintenance routines catches potential issues before they disrupt competitive gaming sessions.
Temperature monitoring during gaming reveals whether overclocks remain thermally sustainable during actual gameplay versus synthetic benchmarks. RivaTuner on-screen display showing GPU temperature, core clock, and utilization percentage provides real-time feedback. Watch temperatures during demanding game scenes ensuring they stay below 80°C ideally. Sustained temperatures above 83°C indicate thermal throttling limiting overclock effectiveness.
Clock speed monitoring identifies thermal throttling or power limit throttling reducing GPU frequencies below target overclocks. If the core clock display shows speeds dropping significantly below your overclock target during gaming, the GPU is throttling. Increase power limit if available, improve cooling through better fan curves or case airflow, or reduce overclock slightly accepting marginally lower performance for sustained stability.
Performance consistency over extended sessions validates that overclocks don’t degrade after thermal saturation. Some overclocks test stable initially but become unstable after 60-90 minutes when components fully heat-soak. Play demanding games for 2-3 hours monitoring frame rates and watching for stuttering, crashes, or artifacts that might appear only after prolonged operation.
Seasonal adjustments account for ambient temperature variations affecting cooling performance. Overclocks stable during winter when room temperatures sit at 18-20°C might become unstable during summer with ambient temperatures reaching 28-30°C. Monitor temperatures across seasons reducing overclocks slightly during hot months or improving cooling through additional case fans or air conditioning.
Driver update retesting validates overclock stability after GPU driver installations. Major driver updates sometimes change power management behavior or workload distribution affecting overclock stability. After updating GPU drivers, run quick stress tests confirming continued stability. Adjust overclocks if necessary to maintain reliability with new driver versions.
Game update validation ensures new game patches or engine updates don’t stress hardware differently causing previously stable overclocks to crash. When games receive major updates, test your overclocks in updated content. New graphical features, rendering techniques, or physics systems might expose instabilities that didn’t exist in earlier versions.
Benchmark logging tracks performance over time identifying degradation suggesting overclocks need adjustment. Run 3DMark or Heaven benchmark monthly saving results with dates. Compare scores over time watching for decreasing performance suggesting thermal paste degradation, dust accumulation, or other issues requiring maintenance. Consistent scores indicate healthy sustained overclock stability.
Dust cleaning maintenance preserves cooling performance preventing gradual thermal degradation. GPU heatsinks accumulate dust over months reducing airflow and increasing temperatures. Every 3-6 months, clean GPU fans and heatsink fins using compressed air. Thorough cleaning prevents dust buildup from gradually reducing overclock headroom through impaired cooling performance.
Thermal paste replacement every 2-3 years maintains optimal heat transfer between GPU die and heatsink. Factory thermal paste degrades over time losing thermal conductivity. Replacing with quality thermal paste like Arctic MX-5 or Thermal Grizzly Kryonaut restores cooling performance. This maintenance particularly benefits cards older than two years where paste degradation noticeably impacts temperatures.
Troubleshooting common GPU overclocking problems
Even carefully implemented overclocks occasionally encounter problems ranging from crashes to artifacts to unexpected performance degradation. Understanding common issues and their solutions helps diagnose and resolve problems efficiently.
Driver crashes during gaming indicate core clock overclock exceeded stability limits. The screen goes black briefly, then Windows displays a message about recovering from driver failure. This specifically points to core clock instability. Reduce core clock by 25-50 MHz, apply settings, and retest. Continue reducing until crashes stop occurring. Driver crashes differ from full system crashes which typically indicate power supply issues or extreme instability.
Visual artifacts suggest memory overclock surpassed stable frequencies. Artifacts manifest as colored pixels, flickering textures, corrupted geometry, or screen tearing unrelated to vsync settings. Memory instability creates these visual glitches without necessarily crashing the driver or system. Reduce memory clock by 100-200 MHz when artifacts appear. Memory overclocking limits vary significantly between cards even of identical models.
Black screen crashes where the system locks requiring hard reset indicate severe instability from aggressive overclocking or insufficient power delivery. These hard crashes suggest reducing both core and memory overclocks substantially, potentially by 100 MHz each. If black screens persist at moderate overclocks, examine power supply capacity and PCIe power cable connections. Loose power cables cause stability problems mimicking overclocking instability.
Performance degradation after initial gains suggests thermal throttling from inadequate cooling. Monitor GPU temperatures during gaming if performance drops below baseline despite applied overclocks. Temperatures consistently above 80°C indicate thermal limiting. Improve fan curves, increase case airflow, clean dust from GPU heatsink, or consider replacing thermal paste if the card is old.
Instability in specific games but not benchmarks reveals game-specific workload patterns triggering issues that synthetic tests miss. Some games stress GPU memory subsystems more than others exposing memory overclocking instability. Other games feature demanding shader compilation triggering core instability. Test problematic games specifically when validating overclocks rather than relying solely on synthetic benchmarks.
Power consumption spikes causing system crashes point to insufficient power supply capacity for overclocked GPU power draw. High-end GPUs can briefly spike to 400-450W during load transitions when overclocked. If crashes occur during game loading screens or scene transitions, inadequate PSU capacity is likely. Reduce power limit in Afterburner limiting maximum GPU power draw, or upgrade to a higher capacity power supply.
Coil whine increasing with overclocking stems from higher frequencies creating audible electromagnetic interference in voltage regulation components. While annoying, coil whine doesn’t indicate hardware damage or instability. Slight voltage increases sometimes reduce coil whine by changing resonant frequencies, though this isn’t guaranteed. Coil whine represents a quality-of-life issue rather than a functional problem requiring overclock reduction.
Thermal throttling despite good temperatures indicates power limit throttling rather than thermal limiting. Modern GPUs throttle based on temperature OR power consumption, whichever limit reaches first. If temperatures look fine but performance lags expectations, check whether GPU hits power limits. Increase power limit slider in Afterburner if available, or accept that the card’s power delivery limits maximum achievable performance.
GPU overclocking by manufacturer and architecture
Different GPU architectures and manufacturer implementations affect overclocking headroom and optimal approaches. Understanding your specific card’s characteristics helps set realistic expectations and apply appropriate techniques.
NVIDIA RTX 4000 series overclocking leverages Ada Lovelace architecture’s efficiency but encounters thermal density challenges. These cards achieve moderate overclocks around 150-250 MHz core increases and 500-1000 MHz memory gains on GDDR6X models. The 4090 particularly benefits from undervolting due to high power consumption generating significant heat in compact chip designs.
NVIDIA RTX 3000 series using Ampere architecture provides solid overclocking headroom with typical gains of 100-200 MHz core and 500-800 MHz memory. Founders Edition cards often have conservative power limits while partner cards from ASUS, MSI, and EVGA provide higher power limits enabling better overclocks. Memory overclocking on 3080 and 3090 models requires attention to VRAM temperatures since GDDR6X runs hot.
AMD Radeon RX 7000 series on RDNA 3 architecture overclocks differently than NVIDIA cards due to architectural differences. AMD cards benefit significantly from power limit increases and undervolting. Typical overclocks range 100-200 MHz on core with memory gains varying by model. AMD’s overclocking tools in Radeon Software provide similar functionality to Afterburner with manufacturer-optimized defaults.
AMD Radeon RX 6000 series RDNA 2 cards achieve impressive overclocks particularly on mid-range models where cooling isn’t as constrained. The 6800 and 6800 XT commonly reach 200-300 MHz overclocks with proper cooling. AMD’s infinity cache reduces memory bandwidth sensitivity making core overclocking more impactful than memory tuning on these cards.
Manufacturer-specific considerations affect overclocking potential based on cooling solution quality and power delivery design. ASUS ROG Strix, MSI Gaming X Trio, and EVGA FTW3 models typically provide better cooling and power delivery enabling more aggressive overclocks. Budget models with minimal cooling struggle to maintain even moderate overclocks without thermal throttling.
Founders Edition cards from NVIDIA offer unique characteristics with reference PCB designs and limited power headroom. These cards achieve respectable overclocks but partner cards with enhanced cooling and power delivery typically overclock 50-100 MHz higher. Founders Edition cards work well for competitive pricing while partner cards suit enthusiasts seeking maximum overclocking potential.
Frequently asked questions about GPU overclocking
Will GPU overclocking void my warranty?
Most GPU manufacturers don’t void warranties for software overclocking since cards include built-in protection preventing dangerous operation. Physical modifications like BIOS flashing or custom cooling installations might affect warranty status. Standard MSI Afterburner overclocking typically preserves warranty coverage.
How much FPS increase can I expect from GPU overclocking?
Typical GPU overclocks provide 10-20% FPS improvements depending on game engine and existing bottlenecks. GPU-limited scenarios see larger gains while CPU-limited games show smaller improvements. Average overclock results range from 10-15 FPS improvement at 1080p to 15-25 FPS gains at 1440p and 4K resolutions.
Is GPU overclocking safe for long-term use?
Yes, when performed within reasonable parameters using proper cooling. Modern GPUs include thermal protection, power limits, and voltage safeguards preventing damage. Conservative overclocks with modest voltage increases present minimal risk to component lifespan. Cards typically become obsolete before overclocking-related wear becomes relevant.
Do I need to overclock both core and memory?
Core clock overclocking provides larger performance gains making it priority. Memory overclocking adds smaller improvements but reduces stuttering and improves frame consistency. Many overclockers achieve 80% of possible gains from core overclocking alone, with memory tweaking providing final polish.
Should I use automatic overclocking features?
Automatic features like NVIDIA Scanner or one-click overclocking profiles provide safe starting points but rarely achieve maximum performance. Manual overclocking tailored to your specific card and cooling setup typically yields 20-30% better results than automatic tools. Use automatic features for convenience or as baselines for manual tuning.
Will overclocking increase my electricity bill significantly?
Overclocked GPUs draw 30-80W more power under load compared to stock settings. For typical gaming usage of 3-4 hours daily, this adds roughly $3-8 monthly to electricity costs. The performance improvement easily justifies the minimal cost increase for most gamers.
Can I overclock laptop GPUs?
Laptop GPU overclocking faces severe thermal constraints limiting overclocking potential. Some gaming laptops with robust cooling support modest overclocks of 50-100 MHz. However, thermal throttling typically prevents meaningful sustained overclocks. Undervolting often provides better results on laptops by reducing temperatures allowing sustained boost clocks.
How do I know if my overclock is stable?
Pass comprehensive stress testing including 30-minute FurMark run, 20-loop 3DMark stress test, and 2-3 hours of actual gaming without crashes, artifacts, or driver resets. Stable overclocks maintain consistent performance without graphical glitches or unexpected temperature spikes indicating throttling.
maximizing gaming performance through GPU optimization
GPU overclocking delivers the most significant performance improvements available through hardware tuning, providing 10-25% FPS gains that rival upgrading to next-tier graphics cards. The combination of modern safety features, user-friendly software tools, and methodical overclocking procedures makes GPU tuning accessible to enthusiasts while remaining safe when proper precautions are followed.
Understanding the relationship between core clocks, memory speeds, power limits, and thermal management enables informed overclocking decisions tailored to specific cards and cooling solutions. The systematic approach of incremental testing, comprehensive stress validation, and ongoing monitoring ensures overclocked settings remain stable during competitive gaming sessions rather than causing crashes at critical moments.
GPU overclocking represents just one component of comprehensive system optimization. Combined with CPU overclocking, memory tuning, and software optimization through registry tweaks and config modifications, overclocked graphics cards contribute to complete performance profiles that extract maximum capability from gaming systems at every level.
For competitive gamers demanding every possible advantage, GPU overclocking provides essential performance gains that transform good gaming experiences into exceptional ones through higher frame rates, reduced input latency, and smoother frame delivery.