Master system-level modifications through BIOS tuning, power management optimization, and thermal solutions. Complete guide to eliminate bottlenecks and maximize gaming stability
optimizing the foundation of gaming performance
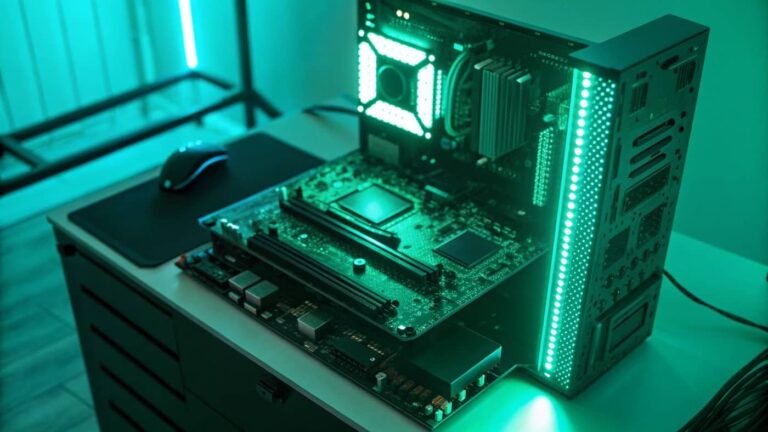
System-level modifications represent the deepest layer of gaming optimization, targeting hardware configurations and firmware settings that control how components interact before Windows even loads. While software tweaks optimize applications and overclocking pushes component frequencies, system-level mods establish the foundational environment determining whether those optimizations can actually deliver sustained performance. A perfectly overclocked GPU throttles without proper thermal management. An optimized CPU wastes potential with inefficient BIOS power delivery settings. Fast RAM means nothing if BIOS training algorithms fail to initialize it correctly.
The distinction between system-level optimization and other performance tuning lies in permanence and scope. Registry tweaks affect Windows behavior but reset with operating system reinstallations. Launch parameters apply only to specific games during individual sessions. System-level modifications persist independently of software installations, controlling hardware behavior from the moment you press the power button. These foundational settings affect every application, every game, and every operating system you run on the hardware.
Gaming performance depends on three critical system-level factors working harmoniously. BIOS settings control hardware initialization, resource allocation, and component communication protocols. Power management determines whether components receive clean, stable electricity enabling maximum performance or suffer from voltage fluctuations causing instability and throttling. Thermal optimization ensures components maintain safe temperatures under sustained gaming loads rather than throttling performance to prevent overheating damage.
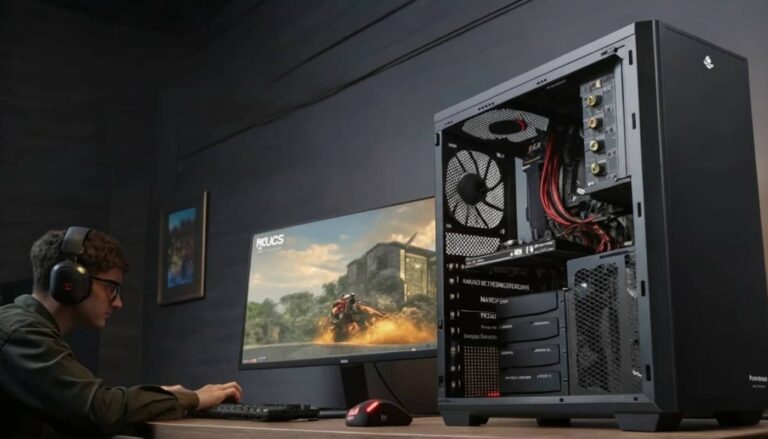
Modern gaming systems generate substantial heat while demanding precise power delivery and optimized hardware configurations. A high-end gaming PC under full load might consume 500-700 watts while generating equivalent heat output. Without proper system-level optimization, this power consumption creates voltage ripple affecting stability, heat generation causes thermal throttling reducing performance, and suboptimal BIOS settings leave performance on the table despite expensive hardware investments.
This comprehensive guide explores system-level modifications that professional system builders and competitive esports organizations implement to ensure maximum reliable performance. You’ll learn BIOS optimization techniques that improve hardware initialization and resource allocation, power management strategies that deliver clean stable electricity to components, and thermal solutions that maintain optimal operating temperatures during extended gaming sessions. These foundational optimizations enable all other performance tweaks to work effectively.
Understanding system-level architecture and dependencies
System-level components interact in complex ways where optimization of one element affects others. Understanding these relationships prevents modifications that improve one area while creating bottlenecks elsewhere.
BIOS or UEFI firmware represents the first software executing when you power on your computer, initializing hardware components before loading operating systems. This firmware controls memory training algorithms determining RAM stability and speed, PCIe lane allocation affecting GPU and storage performance, CPU power delivery affecting overclocking headroom, and boot priority determining system startup behavior. Every component passes through BIOS initialization making its configuration critical for overall system optimization.
Power delivery architecture starts at the wall outlet flowing through power supply unit, motherboard voltage regulation modules, and finally to individual components. Each stage introduces potential efficiency losses, voltage fluctuations, or capacity limitations. A gaming system with 750W PSU doesn’t deliver 750W to components but rather 750W total capacity with efficiency losses at each conversion stage. Understanding power delivery chain helps identify bottlenecks limiting performance or causing instability.
Thermal management systems remove heat through conduction, convection, and radiation. CPU and GPU heat transfers through thermal interface material to heatsinks, then dissipates through ambient air circulation or liquid cooling loops. Case airflow patterns determine whether hot air evacuates efficiently or recirculates creating thermal buildup. Thermal optimization requires holistic approach considering component cooling individually and system-wide thermal dynamics.
Component interdependencies create optimization challenges where improving one element stresses others. Overclocking CPU increases power consumption requiring robust VRM cooling and higher capacity PSU. GPU overclocking generates more heat affecting case ambient temperature impacting CPU cooling. Aggressive RAM overclocking sometimes requires voltage increases that generate heat affecting neighboring components. System-level optimization balances these interdependencies achieving maximum performance without creating new bottlenecks.
Firmware updates from motherboard manufacturers continuously refine BIOS functionality adding features, improving stability, and optimizing hardware support. A motherboard shipped in 2023 might receive a dozen BIOS updates through 2025 improving memory compatibility, fixing bugs, and adding new overclocking features. Staying current with firmware updates ensures access to latest optimizations and bug fixes that improve system stability and performance.
BIOS configuration: foundational hardware optimization
BIOS settings control hardware initialization and configuration at the deepest accessible level. Proper BIOS optimization establishes the foundation enabling all other performance modifications to work effectively.
Boot priority and fast boot settings affect system startup time and hardware initialization procedures. Modern UEFI fast boot skips comprehensive hardware checks reducing boot time from 30-45 seconds to 10-15 seconds. However, fast boot sometimes causes issues with hardware detection or dual-boot configurations. Enable fast boot for gaming-only systems where boot speed matters but disable it if troubleshooting hardware issues or running multiple operating systems.
CSM compatibility support module maintains legacy BIOS compatibility for older operating systems and hardware. Modern Windows 10 and 11 installations don’t require CSM, and disabling it improves boot times while enabling security features like Secure Boot. Disable CSM for clean Windows installations on modern hardware. Enable it only if running older operating systems or legacy hardware requiring BIOS compatibility mode.
Secure boot protects against rootkits and boot sector malware by verifying digital signatures during startup. This security feature sometimes conflicts with older drivers or dual-boot configurations with Linux distributions. Enable Secure Boot for security-focused systems running only Windows. Disable it if compatibility issues arise with specific hardware drivers or alternative operating systems.
PCIe configuration controls bandwidth allocation for graphics cards, storage devices, and expansion cards. Modern motherboards automatically configure PCIe lanes appropriately, but manual optimization sometimes improves performance. Verify GPU runs at PCIe 4.0 x16 or PCIe 3.0 x16 checking GPU-Z or BIOS information. If GPU shows x8 operation, check for conflicts with M.2 drives sharing PCIe lanes requiring BIOS adjustment.
Above 4G decoding and resizable BAR features improve GPU performance in modern games by allowing CPU direct access to entire GPU memory. Enable both settings in BIOS after verifying GPU drivers support resizable BAR technology. These features provide 3-8% FPS improvements in compatible games at no stability or compatibility cost on modern hardware.
SATA configuration determines storage controller operating mode affecting drive performance and compatibility. AHCI mode provides best performance for SATA SSDs enabling features like TRIM and NCQ. IDE/Legacy mode maintains compatibility with older operating systems but limits performance. Use AHCI mode for modern Windows installations with SATA SSDs. RAID mode enables multi-drive arrays for users implementing storage RAID configurations.
USB configuration options control port functionality and power delivery. XHCI hand-off enables proper USB device handover from BIOS to operating system preventing device initialization issues. USB legacy support allows keyboard and mouse operation in BIOS but isn’t needed for modern UEFI interfaces. Disable USB legacy support for cleaner boot process unless troubleshooting requires BIOS-level input device functionality.
Integrated peripherals menu controls onboard audio, network, and secondary controllers. Disable unused onboard devices freeing minimal system resources and reducing potential driver conflicts. However, modern systems suffer negligible impact from enabled unused peripherals, making this optimization mostly relevant for troubleshooting specific conflicts rather than performance gains.
CPU configuration settings including virtualization, hyperthreading, and C-states affect processor behavior. Enable virtualization (VT-x or AMD-V) if running virtual machines for development or testing. Hyperthreading or SMT provides performance benefits in multi-threaded workloads though some competitive gamers disable it reducing latency in specific titles. C-states enable power saving but introduce latency, with C-state disabling providing marginal latency reduction at the cost of increased idle power consumption.
Advanced BIOS tuning for maximum performance
Beyond basic configuration, advanced BIOS settings provide granular control over hardware behavior enabling expert-level optimization for competitive gaming systems.
Memory timing configuration in BIOS determines RAM performance beyond simple XMP profile activation. Manual timing adjustment of primary, secondary, and tertiary timings extracts performance beyond manufacturer profiles. Access advanced memory configuration menus adjusting CAS latency, tRCD, tRP, tRAS, and dozens of secondary timings. This deep optimization requires extensive testing but provides 5-15% performance improvements in memory-sensitive games and applications.
Load line calibration controls voltage regulation behavior under load preventing voltage droop that causes instability. LLC settings range from low to extreme with moderate levels recommended for most overclocking. Level 4 or 5 on typical 8-level scales prevents excessive voltage droop without dangerous overshoot. Improper LLC settings cause crashes under load or voltage spikes damaging components, making careful LLC configuration essential for overclocking stability.
VRM phase control determines how motherboard voltage regulation modules deliver power to CPU. Some motherboards offer efficiency mode for cool operation or performance mode maximizing power delivery for overclocking. Select performance mode when overclocking CPU accepting increased VRM heat generation. Use efficiency mode for stock or mild overclocks reducing unnecessary heat and fan noise.
CPU power limits control maximum sustained and burst power consumption affecting boost behavior and overclocking headroom. Default power limits ensure CPUs don’t exceed motherboard VRM capabilities but limit performance on robust boards. Increase PL1 and PL2 power limits on quality motherboards enabling sustained boost frequencies during gaming. Monitor VRM temperatures after increasing power limits ensuring adequate cooling exists for higher power delivery.
CPU current limits work alongside power limits preventing excessive current draw that could damage VRM components. Default current limits prove conservative on quality motherboards, with increased limits enabling better sustained performance. Raise current limits proportionally with power limits maintaining safe VRM operation while eliminating artificial throttling.
Spread spectrum settings reduce electromagnetic interference by varying base clock frequency slightly. This EMI reduction technique causes minor frequency variance that can complicate overclocking validation. Disable spread spectrum for cleaner frequency operation when overclocking, enabling precise frequency targeting without variance from spread spectrum modulation.
Performance mode versus quiet mode fan curves affect component cooling and system noise. Performance mode runs fans aggressively maintaining lower temperatures at higher noise levels. Quiet mode prioritizes noise reduction accepting higher temperatures within safe ranges. Create custom fan curves in BIOS balancing temperature targets against noise tolerance, typically using performance-oriented curves for CPUs and GPUs while maintaining quieter curves for case fans.
TPM and fTPM settings enable hardware security features required by Windows 11 and modern security applications. Enable TPM for Windows 11 compatibility and enhanced security through hardware-based encryption. Some early fTPM implementations caused stuttering in gaming requiring BIOS updates, though modern firmware resolves these issues making TPM enablement safe for gaming systems.
Power management optimization for stability and performance
Clean stable power delivery enables components to operate at maximum performance without instability from voltage fluctuations or inadequate power capacity.
Power supply unit selection determines foundation of reliable power delivery. Quality PSUs maintain tight voltage regulation under varying loads while cheap units exhibit voltage fluctuations causing system instability. Gaming systems require PSUs with 80 Plus Bronze minimum certification, though 80 Plus Gold or Platinum units provide better efficiency and voltage regulation. Calculate required capacity by adding component power consumption plus 30% headroom ensuring PSU operates in efficient range rather than maximum capacity.
PSU efficiency curves show power supplies operate most efficiently at 50-80% load with reduced efficiency near maximum capacity. A gaming system consuming 400W under load performs better with 650W PSU running at 60% load than 500W PSU operating at 80% capacity. The more efficient operating point provides cleaner power delivery with less heat generation in PSU improving reliability and component lifespan.
Voltage rail quality affects component stability with independent 12V rails providing better isolation than single rail designs. Multi-rail PSUs isolate different subsystems preventing issues in one component from affecting others through shared power delivery. Single rail designs simplify power delivery but lack isolation benefits. Quality PSUs of either design type perform adequately though multi-rail offers theoretical advantages for complex systems with many components.
Cable management affects airflow and aesthetics but also electrical performance through reduced resistance. Excessive cable bundling creates airflow obstruction while poor connections introduce resistance reducing delivered voltage. Use appropriate gauge cables for high-power components with GPU requiring quality PCIe power cables rated for sustained high current. Modular PSUs enable cleaner cable routing using only necessary cables reducing clutter.
Surge protection through quality power strips or UPS systems protects components from electrical grid instability. Gaming systems contain expensive components vulnerable to voltage spikes from lightning strikes or grid issues. Invest in surge protectors with adequate joule ratings (2000+ joules minimum) for gaming system protection. UPS systems provide additional benefits of battery backup preventing data loss from unexpected power outages.
Power strip quality varies dramatically with cheap strips providing minimal surge protection and high resistance reducing delivered power quality. Quality power strips feature heavy gauge wiring, proper grounding, and EMI filtering improving power delivery to PSU. Avoid daisy-chaining power strips which increases resistance and reduces delivered voltage potentially causing system instability under load.
Grounding verification ensures proper electrical ground reducing risk of electrical shock and improving system stability. Verify wall outlets have proper ground using outlet tester. Improper grounding sometimes causes intermittent system issues including unexpected shutdowns or component instability. Address grounding issues through qualified electrician before assuming hardware problems cause system instability.
Dedicated circuit for high-performance gaming systems eliminates competition with other household appliances. Gaming systems on shared circuits with refrigerators, air conditioners, or other high-draw appliances experience voltage fluctuations when those devices cycle on. Dedicated 20-amp circuit provides clean power delivery without interference from other loads improving system stability during peak gaming sessions.
Thermal optimization: maintaining performance through heat management
Thermal management determines whether components maintain maximum performance or throttle to prevent overheating. Comprehensive thermal optimization addresses individual component cooling and system-wide airflow.
Case airflow principles follow front intake, rear exhaust patterns establishing positive pressure that prevents dust infiltration while removing heat. Front fans draw cool ambient air over storage drives and lower GPU area. Rear exhaust fans remove heated air from CPU area. Top exhaust fans evacuate hot air rising naturally from components. This airflow pattern maintains optimal thermal environment for all components.
Positive pressure versus negative pressure configurations affect dust accumulation and thermal performance. Positive pressure with more intake than exhaust creates slight internal pressure preventing dust infiltration through case gaps. Negative pressure with more exhaust than intake creates vacuum drawing cool air through all openings but also pulling dust into case. Use positive pressure for dust-sensitive environments accepting slightly higher noise from additional intake fans.
Fan placement optimization targets specific thermal challenges. Mount intake fans in front lower section providing cool air directly to GPU. Position exhaust fans rear upper area removing CPU heat. Top exhaust fans evacuate accumulated hot air from case interior. Side panel fans sometimes help GPU cooling in large cases but create turbulent airflow in compact builds reducing effectiveness.
Fan curve customization through BIOS or fan control software balances cooling performance against noise. Configure aggressive curves ramping fans to 70-80% speed at 60-70°C for components, reaching maximum speed at 75-80°C. This keeps temperatures well below thermal throttling thresholds while accepting higher noise during intensive gaming. Alternatively, create quieter curves accepting temperatures closer to 80°C prioritizing noise reduction.
Case fan selection between static pressure and airflow-optimized fans affects cooling effectiveness. Static pressure fans force air through restrictive spaces like radiators and dense heatsinks. High airflow fans move large air volumes in unrestricted spaces like case intake and exhaust. Use static pressure fans on radiators and CPU tower coolers while using airflow fans for case ventilation achieving optimal cooling efficiency.
Dust management through filters and regular cleaning maintains cooling performance over time. Dust accumulation on heatsinks and fan blades reduces cooling effectiveness by 10-20% over months of operation. Install dust filters on intake fans trapping particulates before entering case. Clean filters monthly and perform thorough internal cleaning every 3-6 months removing dust from heatsinks, fan blades, and PCB surfaces.
Thermal paste application affects CPU and GPU cooling performance. Stock thermal paste applications sometimes use excessive paste creating thick layers with poor thermal conductivity. Properly applied thermal paste uses thin layers spreading evenly under heatsink pressure. Quality thermal pastes like Arctic MX-5 or Thermal Grizzly Kryonaut provide superior thermal conductivity compared to stock pastes. Reapply thermal paste every 2-3 years maintaining optimal heat transfer.
GPU thermal pad replacement improves memory and VRM cooling on graphics cards where stock pads use inadequate thickness or low-quality materials. High-performance thermal pads like Gelid Extreme or Thermalright Odyssey provide better thermal conductivity reducing VRAM temperatures by 10-15°C. Lower memory temperatures enable higher stable memory overclocks particularly on GDDR6X cards that run hot stock.
Liquid cooling advantages include superior heat capacity and quieter operation compared to air cooling. All-in-one liquid coolers provide easy installation with performance exceeding high-end air coolers. Custom liquid cooling loops offer maximum cooling performance with flexibility to cool multiple components. Liquid cooling enables aggressive overclocking through lower temperatures though installation complexity and cost exceed air cooling solutions.
Ambient temperature control through room air conditioning significantly impacts component temperatures. Reducing ambient temperature from 25°C to 20°C lowers component temperatures by equivalent 5°C improving thermal headroom for overclocking. Air-conditioned gaming rooms enable better performance than non-climate-controlled spaces though most gamers achieve adequate cooling through proper case airflow without dedicated room cooling.
System monitoring and preventive maintenance
Ongoing monitoring and maintenance ensure system-level optimizations remain effective long-term preventing gradual performance degradation from component aging and environmental factors.
Hardware monitoring software tracks temperatures, voltages, fan speeds, and power consumption revealing potential issues before they cause crashes or component damage. HWiNFO64 provides comprehensive sensor monitoring displaying dozens of metrics from motherboard sensors, CPU temperature sensors, GPU monitoring, and storage drive SMART data. Enable sensor logging during gaming sessions analyzing data for temperature spikes, voltage fluctuations, or throttling indicators.
Temperature baselines established when system is new provide reference points for detecting cooling degradation. Record CPU, GPU, VRM, and storage temperatures during stress testing and typical gaming when system is freshly built. Compare these baselines to temperatures measured 6-12 months later identifying degradation from dust accumulation or thermal paste aging. Temperature increases of 5-10°C suggest maintenance needs.
Fan failure detection through monitoring fan RPM prevents thermal damage from failed cooling. Configure monitoring software to alert when fan speeds drop below expected RPM indicating bearing failure or cable disconnection. Fan failures sometimes occur gradually with bearing wear causing noise increase and RPM reduction before complete failure. Replace fans showing sustained RPM drops or unusual noise preventing thermal emergencies.
VRM temperature monitoring reveals motherboard power delivery stress particularly when overclocking CPUs. Excessive VRM temperatures above 90-100°C indicate inadequate VRM cooling for applied power delivery loads. Improve VRM cooling through additional case fans directing airflow over motherboard power delivery area or reduce CPU power limits if VRM cooling cannot be improved further.
Storage drive health monitoring through SMART data reveals potential drive failures before data loss occurs. Monitor drive temperature, reallocated sector counts, and read error rates identifying drives approaching failure. Modern SSDs provide wear leveling data showing remaining lifespan through percentage of rated write endurance consumed. Replace drives showing degraded SMART metrics before failures occur during critical gaming sessions.
Power consumption monitoring validates PSU adequate for system demands and reveals power efficiency trends. Use software monitoring or hardware power meters measuring wall power consumption during gaming. Compare actual consumption to PSU capacity ensuring system operates below 80% PSU capacity maintaining efficiency. Increasing power consumption over time might indicate components drawing more power due to age or degradation.
BIOS update management requires balancing benefits of new features against risks of firmware flashing. Check motherboard manufacturer website monthly for BIOS updates reading change logs identifying meaningful improvements versus minor fixes. Update BIOS when updates add desired features, fix stability issues, or improve memory compatibility. Avoid updating “just because” when current BIOS functions satisfactorily reducing risk from potentially problematic updates.
Preventive maintenance scheduling establishes routines maintaining optimal system performance. Monthly maintenance includes dust filter cleaning and visual inspection. Quarterly maintenance adds thorough internal dusting and fan functionality verification. Annual maintenance includes thermal paste replacement, comprehensive cleaning, and cable management review. This schedule prevents gradual degradation that reduces performance over years of operation.
Troubleshooting system-level issues
System-level problems manifest as instability, performance degradation, or component failures requiring systematic diagnostic approaches identifying root causes.
POST failure diagnosis starts with motherboard beep codes or LED indicators revealing which component fails initialization. No beep with no display suggests PSU failure, RAM not seated, or motherboard power issue. Series of beeps indicate specific errors with patterns documented in motherboard manuals. Clear CMOS resetting BIOS to defaults often resolves POST failures from corrupted BIOS settings or failed overclocking attempts.
Thermal throttling identification requires monitoring clock speeds during gaming observing whether frequencies drop below expected values. CPU thermal throttling at 95-100°C reduces clocks preventing overheating damage. GPU throttling occurs around 83-87°C for most cards. Frequent throttling indicates inadequate cooling requiring improved case airflow, better CPU cooler, or thermal paste replacement addressing elevated temperatures.
Voltage instability causes crashes under load or system resets during gaming. Monitor voltage rails during intensive workloads watching for fluctuations exceeding 5% of nominal values. Unstable voltages suggest PSU problems, poor power delivery from wall outlet, or inadequate VRM cooling on motherboard. Address voltage instability through PSU replacement, dedicated electrical circuit, or improved VRM cooling depending on identified cause.
Component temperature abnormalities indicate cooling failures or thermal interface problems. CPU or GPU temperatures exceeding 85-90°C under normal gaming loads suggest heatsink mounting issues, dried thermal paste, or blocked airflow. Verify all fans operate properly, heatsinks are securely mounted, and thermal paste was applied correctly when built. Remount coolers with fresh thermal paste addressing mounting or interface material issues.
Boot loop issues where system repeatedly attempts startup without successful boot stem from hardware initialization failures. Failed RAM training on AMD systems causes boot loops requiring multiple attempts or CMOS clear resetting memory settings. Incompatible hardware combinations or failing components also cause boot loops. Systematically remove components identifying which component prevents successful boot isolating hardware problems.
Blue screen errors with system service exceptions or hardware errors point to driver conflicts or failing hardware. Note stop codes from blue screens researching specific errors identifying affected components or drivers. Hardware errors often indicate failing RAM, storage drives, or overheating components. Run memory tests, monitor temperatures, and check storage SMART data diagnosing hardware problems versus software issues.
Frequently asked questions about system-level modifications
Are BIOS updates necessary for gaming systems?
BIOS updates provide bug fixes, improved hardware compatibility, and sometimes performance improvements. Update when new features benefit your system or when addressing specific stability issues. Avoid updating unnecessarily since firmware flashing carries minimal but real risk of corrupting BIOS requiring hardware recovery procedures.
What PSU wattage do I need for gaming?
Calculate component power consumption adding GPU TDP, CPU TDP, and 100-150W for other components. Add 30% headroom for efficiency and future upgrades. Typical gaming systems need 650-750W PSUs while high-end systems with flagship GPUs require 850-1000W units. Quality matters more than raw capacity with reputable brands providing cleaner power delivery.
How often should I clean my PC?
Clean dust filters monthly or bi-weekly in dusty environments. Perform thorough internal cleaning every 3-6 months depending on environment. Systems in carpeted rooms or homes with pets require more frequent cleaning than systems in clean environments. Monitor temperatures establishing cleaning schedules maintaining optimal thermal performance.
Do I need liquid cooling for gaming?
High-end air coolers like Noctua NH-D15 adequately cool most gaming CPUs including moderate overclocks. Liquid cooling provides benefits for aggressive overclocking, quieter operation, or aesthetic preferences. Budget gaming systems perform fine with tower air coolers while enthusiast builds benefit from AIO liquid cooling or custom loops for maximum thermal performance.
Can improper BIOS settings damage hardware?
Excessive voltages damage components over time accelerating degradation or causing immediate failure. Conservative BIOS settings within manufacturer specifications present minimal risk. Modern components include protection mechanisms preventing catastrophic damage from typical BIOS settings. Exercise caution with voltage adjustments researching safe ranges for specific components before applying extreme settings.
Why is my system unstable after BIOS updates?
BIOS updates sometimes reset settings to defaults requiring reconfiguration of XMP profiles, overclocks, and custom settings. New BIOS versions occasionally introduce bugs or change memory training behavior affecting stability. Clear CMOS after problematic BIOS updates returning to defaults, then reapply optimizations incrementally identifying which settings cause instability with new firmware.
What causes coil whine and can it be fixed?
Coil whine results from electromagnetic vibrations in VRM components or GPUs operating at high frequencies. While annoying, coil whine doesn’t indicate hardware defects or predict failures. Slight voltage adjustments sometimes reduce coil whine by changing resonant frequencies. Capacitor quality affects coil whine with premium components exhibiting less noise than budget alternatives.
How do I know if my temperatures are too high?
CPUs safely operate up to 95-100°C though sustained temperatures above 85°C reduce boost performance and accelerate aging. GPUs throttle around 83-87°C with sustained operation above 80°C indicating cooling improvements needed. VRMs safely handle 90-100°C though temperatures above 90°C suggest improved airflow would benefit motherboard longevity. Monitor temperatures targeting 70-80°C under gaming loads for optimal balance.
building reliable high-performance gaming foundations
System-level modifications establish the foundational environment enabling all other optimizations to deliver sustained reliable performance. Proper BIOS configuration initializes hardware optimally, quality power delivery maintains stability under load, and comprehensive thermal management prevents throttling during extended gaming sessions. These fundamental optimizations work synergistically creating systems that maintain maximum performance consistently rather than suffering from intermittent throttling or instability.
The holistic approach to system-level optimization recognizes interdependencies between BIOS settings, power delivery, and thermal management. Aggressive overclocking enabled through BIOS requires robust power delivery and excellent cooling functioning properly. Weak links in power supply quality or inadequate thermal solutions undermine performance gains from optimal BIOS configurations. Comprehensive optimization addresses all three areas simultaneously achieving maximum reliable results.
Ongoing monitoring and preventive maintenance ensure system-level optimizations remain effective long-term. Hardware ages, thermal paste dries, dust accumulates, and firmware updates change behavior requiring periodic verification that optimizations continue functioning effectively. Established maintenance routines prevent gradual performance degradation maintaining day-one performance years after initial system build.
System-level modifications combined with component overclocking, memory tuning, and software optimization create complete performance profiles that extract maximum capability from gaming hardware. This comprehensive approach to optimization delivers competitive advantages through higher sustained frame rates, lower latency, and rock-solid stability that makes the difference in competitive gaming scenarios where consistency matters as much as peak performance.