Finding the perfect balance between visual quality and performance defines the modern gaming experience. Every graphics setting represents a tradeoff between how games look and how smoothly they run. Some settings dramatically impact frame rates for minimal visual improvement, while others enhance immersion with negligible performance cost. Understanding these relationships lets you create configurations that look stunning while maintaining the responsiveness competitive gaming demands. The key lies in identifying which visual features matter most for your preferred games and which can be sacrificed for better performance. This guide examines every major graphics setting, explaining its visual impact, performance cost, and optimal configuration for different gaming scenarios.
Understanding the visual quality spectrum
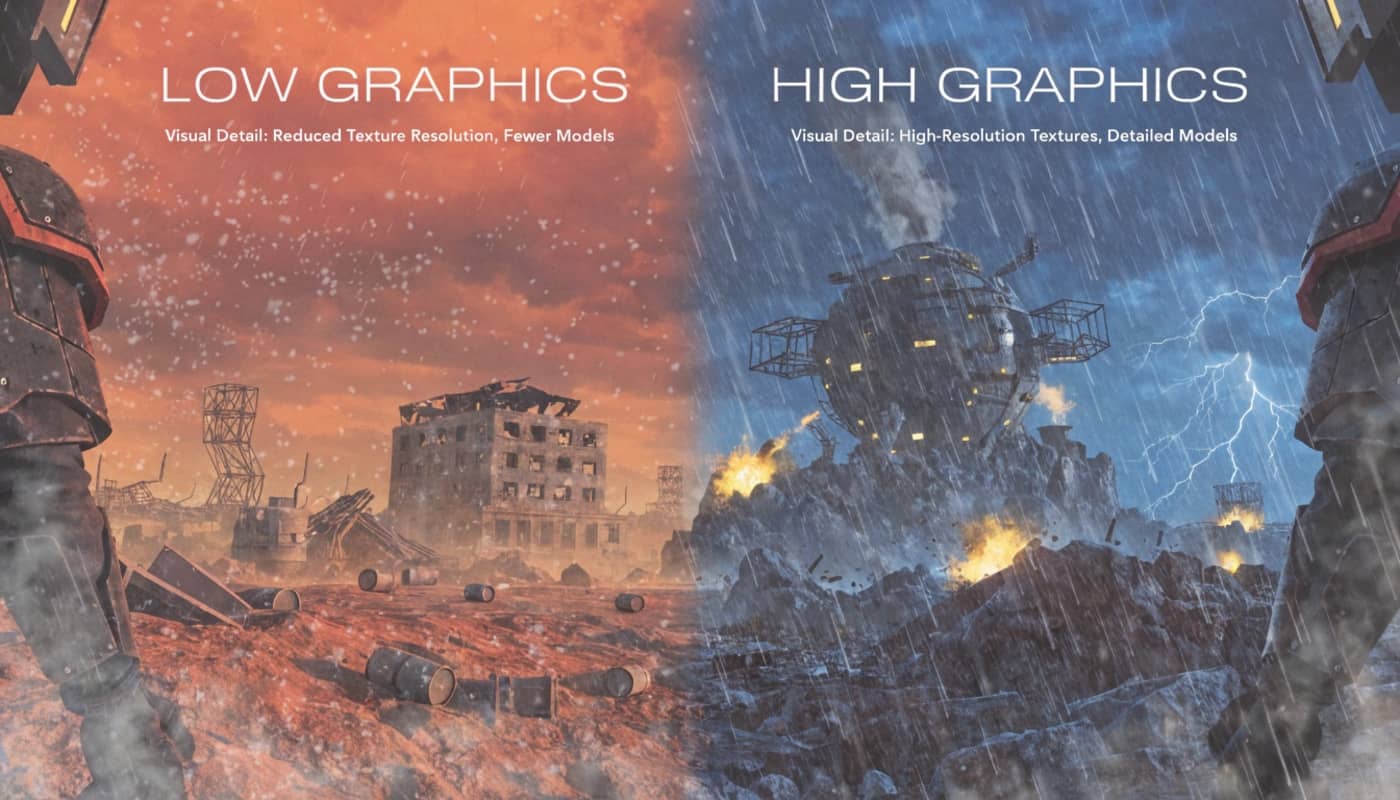
Graphics settings exist on a spectrum between maximum fidelity and maximum performance. On one extreme sits ultra settings with ray tracing, rendering every detail the developers envisioned. On the other sits low settings with minimal effects, prioritizing frame rates above all else. Most players benefit from landing somewhere in the middle, selectively enabling features that enhance their experience.
Visual fidelity encompasses multiple components working together. Texture quality provides surface detail. Lighting creates atmosphere and realism. Shadows add depth perception. Post-processing effects polish the final image. Each component contributes uniquely to the overall visual experience, and their importance varies by game genre and personal preference.
Performance impact varies dramatically between settings. Shadow quality might cost 20% of your frame rate while texture quality costs almost nothing until you exceed video memory limits. Understanding these relationships prevents wasting performance on settings that barely improve visuals while preserving resources for settings that matter.
Diminishing returns plague the highest quality settings. The jump from low to medium shadows is visually dramatic. Medium to high shows clear improvement. High to ultra becomes increasingly subtle. Ultra to maximum often requires close inspection to notice differences while costing substantial performance. Recognizing these diminishing returns helps identify the sweet spot for each setting.
Game engine differences mean settings don’t scale equally across titles. Unreal Engine games handle certain effects differently than Unity or proprietary engines. A setting that tanks performance in one game might run fine in another. Research settings guides for your specific games rather than applying universal configurations blindly.
Resolution forms the foundation upon which all other settings build. Higher resolutions provide inherent clarity that can compensate for lower quality settings. Conversely, lower resolutions benefit more from maxed settings since the reduced pixel count means fewer details to notice anyway. Balance resolution with individual settings for optimal results.
Texture quality and filtering
Texture quality determines surface detail on objects and environments. This setting controls which resolution textures the game loads, with higher settings using larger, more detailed texture files. The visual impact is immediately noticeable, affecting everything from character faces to wall surfaces to ground terrain.
Video memory consumption represents texture quality’s primary cost. High resolution textures consume significantly more VRAM than lower quality versions. A game might use 3GB VRAM on medium textures but 6GB on ultra. As long as you stay within your graphics card’s VRAM capacity, texture quality has minimal frame rate impact.
Streaming and loading times increase with higher texture quality. Games must read larger files from storage and transfer them to VRAM. This can cause texture pop-in on slower storage devices or brief stutters during fast movement through detailed environments. SSDs largely eliminate these issues, making high texture quality practical.
Texture filtering smooths textures when viewed at angles or distances. Anisotropic filtering specifically improves texture clarity on surfaces extending away from the camera. The performance cost of 16x anisotropic filtering is negligible on modern GPUs, typically 1-2% frame rate reduction, while the visual improvement is substantial on roads, floors, and landscape textures.
Optimal texture settings depend entirely on VRAM capacity. With 8GB or more VRAM, run textures on high or ultra in most games. With 4-6GB, use high in competitive games and medium in demanding open-world titles. Below 4GB requires medium or low to prevent memory-related stuttering. Monitor VRAM usage with tools like MSI Afterburner to ensure you’re not exceeding capacity.
Texture streaming quality in modern games dynamically adjusts loaded texture resolution based on available VRAM and distance from camera. Setting this to high or ultra ensures the game prioritizes texture quality when memory allows. The dynamic nature means you can often run higher texture settings than static allocation would permit.
Shadow quality and resolution
Shadows provide depth perception and realism but come at significant performance cost. Shadow rendering requires calculating light interactions with every object from multiple angles, making it one of the most computationally expensive visual features in modern games.
Shadow resolution controls the sharpness and detail of shadow edges. Low resolution creates blocky, pixelated shadows while ultra resolution produces crisp, realistic edges. The visual difference between high and ultra is often minimal unless you’re specifically looking at shadows. Medium to high represents the sweet spot for most players.
Shadow distance determines how far from the camera shadows render. Reducing shadow distance improves performance substantially in open-world games where distant objects would otherwise cast shadows. Most players never notice shadows disappearing beyond 50-75 meters since they’re focused on immediate surroundings and targets.
Shadow cascades control the quality of shadows at different distances from the camera. More cascades mean smoother transitions between shadow quality levels but cost additional performance. Two to three cascades work well for competitive gaming while four or more suit screenshot enthusiasts willing to sacrifice frame rates.
Contact shadows add fine detail where objects meet surfaces, like fingers on a table or feet on the ground. These micro-shadows enhance realism but cost 3-5% performance. For competitive gaming, disable contact shadows. For immersive single-player experiences, they’re worth enabling if you have performance headroom.
Soft shadows blur shadow edges for more realistic appearance compared to harsh, sharp shadows. Soft shadow algorithms vary in performance cost, with percentage-closer soft shadows being relatively cheap and ray-traced soft shadows being extremely expensive. Medium soft shadow quality provides good visual results without the ultra premium cost.
Optimal shadow settings vary dramatically by genre. Competitive shooters benefit from low to medium shadows to reduce visual clutter and maximize frame rates. Single-player adventures can use high shadows for atmosphere. Strategy games where shadows aid unit identification should use medium settings. Adjust based on whether shadows help or hinder your gameplay.
Anti-aliasing techniques
Anti-aliasing smooths jagged edges that result from rendering on discrete pixel grids. Different techniques offer varying quality and performance tradeoffs, making anti-aliasing one of the most complex graphics settings to optimize.
FXAA represents the fastest anti-aliasing technique, adding only 1-2% performance cost. It works by blurring edges after rendering completes, which smooths jaggies but can make the entire image slightly softer. FXAA suits competitive gaming where minimal performance impact matters more than perfect image quality.
TAA or temporal anti-aliasing uses information from previous frames to reconstruct smoother edges. Modern implementations provide excellent quality but can introduce ghosting during fast motion and make the image slightly blurry. TAA typically costs 5-10% performance while delivering quality approaching much more expensive techniques.
MSAA or multisample anti-aliasing renders edges at higher resolution then downsamples them. This provides excellent quality without blur but comes at massive performance cost, often 30-50% frame rate reduction at 4x MSAA. Modern games rarely implement MSAA due to incompatibility with deferred rendering pipelines.
SMAA or subpixel morphological anti-aliasing offers middle ground between FXAA and TAA. It analyzes edge patterns and selectively applies anti-aliasing without blurring the entire image. SMAA costs slightly more than FXAA but less than TAA while providing cleaner results than FXAA’s blur-based approach.
Resolution-based anti-aliasing through supersampling or downsampling provides the highest quality at the highest cost. Rendering at 4K and displaying at 1080p effectively applies 4x supersampling anti-aliasing. This eliminates jaggies completely but requires GPU power to render at the higher resolution.
Native resolution considerations make anti-aliasing less necessary at higher resolutions. At 1440p and especially 4K, pixel density naturally reduces visible jaggies. Many competitive players disable anti-aliasing entirely at these resolutions, gaining performance while accepting minimal edge roughness.
Upscaling technology interaction with anti-aliasing requires careful configuration. DLSS and FSR include their own anti-aliasing as part of the reconstruction process. Enabling additional anti-aliasing can create overly soft images. When using upscaling, disable separate anti-aliasing and rely on the upscaler’s built-in edge smoothing.
Ambient occlusion methods
Ambient occlusion adds realistic shadowing in corners and crevices where ambient light would naturally be blocked. This subtle effect dramatically improves depth perception and makes scenes feel more three-dimensional rather than flat.
SSAO or screen space ambient occlusion represents the most basic technique, calculating occlusion based on depth buffer information visible on screen. It’s the fastest method with 2-5% performance cost but can produce artifacts where it lacks information outside the screen space.
HBAO or horizon-based ambient occlusion improves upon SSAO by using better algorithms for determining occlusion. NVIDIA’s HBAO+ implementation provides higher quality shadowing with reasonable performance cost, typically 5-8% frame rate reduction. The visual improvement over SSAO is noticeable in detailed environments.
HDAO and other AMD-optimized techniques provide alternatives to NVIDIA’s HBAO. These methods offer similar quality to HBAO with performance optimized for AMD GPUs. The practical difference between vendor-specific implementations is minimal on modern hardware.
Ray-traced ambient occlusion calculates physically accurate shadowing by tracing light rays through the scene. This provides the most realistic results but costs 20-40% performance even on RTX 4000-series cards. Reserve ray-traced ambient occlusion for high-end systems or screenshot sessions rather than competitive gameplay.
Disabling ambient occlusion entirely removes subtle depth cues but frees 5-10% performance. Competitive players often disable it for both performance and slightly improved visibility. Single-player gamers typically enable at least SSAO for the depth perception benefits that enhance immersion.
Quality levels within each technique let you fine-tune the tradeoff. Low ambient occlusion provides most of the depth perception benefit at minimal cost. High and ultra settings increase shadow accuracy and reduce artifacts but with diminishing visual returns. Medium quality ambient occlusion represents the sweet spot for most scenarios.
Reflection quality and techniques
Reflections enhance realism by showing the environment mirrored on reflective surfaces. Implementation methods range from simple cube maps to full ray tracing, each with distinct visual characteristics and performance implications.
Screen space reflections render reflections using only information visible on screen. This works well for puddles and floors reflecting objects above them but fails when the reflected object is off-screen. The technique is relatively cheap, costing 5-10% performance while providing convincing reflections in many scenarios.
Planar reflections render a second view of the scene from the reflection’s perspective. This provides accurate reflections for flat surfaces like mirrors and water but costs significant performance since it effectively renders portions of the scene twice. Use planar reflections only when mirrors or water reflections significantly impact your experience.
Cube map reflections use prerendered environment maps to approximate reflections. These are very cheap performance-wise but show static, often inaccurate reflections. Most games use cube maps for background reflections on metal and glass surfaces where accuracy matters less than having something reflective.
Ray-traced reflections calculate physically accurate reflections by tracing light rays through the scene. The visual improvement over screen space reflections is dramatic, especially on complex surfaces and with moving objects. However, even one ray per pixel costs 30-50% performance, limiting ray-traced reflections to high-end hardware.
Reflection quality settings typically control resolution and ray count. Low settings reduce reflection resolution and use fewer rays for ray tracing. High settings increase both, providing sharper, more accurate reflections at increased cost. Medium quality reflections are often indistinguishable from high during actual gameplay.
Practical reflection optimization involves disabling reflections entirely in competitive games where they don’t aid gameplay. For immersive titles, use screen space reflections on medium settings. Enable ray tracing only on RTX 4070 or higher if you can maintain acceptable frame rates. Remember that reflections primarily enhance atmosphere rather than gameplay clarity.
Post-processing effects
Post-processing effects apply after the main scene renders, adding cinematic polish to the final image. Many serve purely aesthetic purposes, making them prime candidates for disabling when optimizing for performance.
Motion blur simulates camera exposure during fast movement. It can enhance perceived smoothness at low frame rates but obscures detail during action, making it counterproductive for competitive gaming. Disable motion blur in all competitive titles. Consider enabling it only in cinematic single-player games if you prefer the film-like aesthetic.
Depth of field blurs distant or nearby objects to mimic camera focus. This draws attention to specific elements but reduces overall visual information. Competitive players should always disable depth of field since it literally blurs potential threats. Cinematically-focused players might enable it for screenshots but disable during active gameplay.
Bloom and lens flare simulate light bleeding and lens artifacts. These effects add atmosphere but can obscure visibility around bright objects like muzzle flashes or the sun. Low bloom settings provide some atmospheric enhancement without major performance cost or visibility issues.
Chromatic aberration mimics lens distortion, separating colors at screen edges. This effect serves no gameplay purpose and makes the image objectively worse from a clarity standpoint. Disable chromatic aberration universally unless you specifically prefer the distorted aesthetic for artistic reasons.
Film grain adds noise to simulate old film stock. This serves purely aesthetic purposes and should be disabled by anyone prioritizing visual clarity. The minor performance savings from disabling it are negligible, but the clarity improvement is immediately noticeable.
Vignetting darkens screen edges to draw focus toward the center. Like chromatic aberration, this reduces usable visual information without providing gameplay benefits. Disable vignetting to maximize screen real estate and peripheral awareness.
Color grading and tone mapping adjust the overall color palette and brightness curves. These settings significantly impact game atmosphere but rarely cost meaningful performance. Adjust color grading based on personal preference rather than performance concerns. Some games offer competitive presets that increase visibility through adjusted color grading.
Volumetric effects and particle density
Volumetric rendering creates realistic fog, clouds, and light shafts by simulating light scattering through volumes rather than just surfaces. These effects dramatically enhance atmosphere but come at significant computational cost.
Volumetric lighting simulates god rays and light shafts streaming through atmospheric particles. The effect is visually stunning in appropriate scenes but can cost 10-20% performance. Reduce volumetric lighting quality or disable it entirely in competitive games since it doesn’t enhance gameplay clarity.
Volumetric fog and clouds create realistic atmospheric effects that interact with lighting. High quality volumetric fog makes environments feel more immersive but costs 5-15% performance depending on implementation. Lower the quality setting rather than disabling entirely to maintain some atmospheric effect with reduced cost.
Particle effects control explosions, smoke, fire, and environmental details like falling leaves. High particle counts create spectacular visual chaos but can cause frame drops during intense action when you need performance most. Medium particle settings maintain visual feedback while preventing action-induced frame drops.
Particle lighting determines whether particles cast or receive shadows and lighting effects. Fully lit particles look more realistic but cost additional performance. Disabling particle lighting maintains the particles themselves while removing the expensive lighting calculations that rarely contribute meaningfully to the visual experience.
Transparency quality affects how the game renders see-through effects like glass, smoke, and particles. Lower transparency settings use simpler rendering that can cause visual artifacts but significantly improves performance. Medium transparency quality provides good balance, reserving high settings for screenshot scenarios.
View distance and level of detail
View distance settings control how far the game renders detailed objects and geometry. These settings particularly impact performance in open-world games where distant terrain and objects extend to the horizon.
Object draw distance determines when objects appear or disappear at range. Reducing draw distance can dramatically improve performance in games with lots of objects. However, competitive multiplayer games rarely benefit since engagement distances are limited and seeing distant players matters for gameplay.
Terrain quality and LOD or level of detail controls how detailed distant terrain appears. Lower settings simplify distant geometry, reducing polygon counts. The performance gain in open-world games can be substantial while the visual impact is minimal since you’re focused on nearby areas during active gameplay.
LOD bias settings adjust at what distance the game switches between detail levels. Increasing LOD bias makes transitions happen closer to the camera, improving performance but potentially making transitions more noticeable. Default LOD bias works well for most scenarios unless you’re desperate for additional performance.
Foliage density dramatically impacts performance in games with heavy vegetation. Ultra foliage settings in games like Red Dead Redemption 2 or Far Cry can cost 20-30% performance. Medium foliage maintains adequate visual density while providing substantial performance gains over high or ultra settings.
Population density in games with crowds affects both CPU and GPU performance. Reducing NPC density improves frame rates without impacting gameplay in most cases. Competitive multiplayer games rarely include NPC crowds, making this setting relevant primarily for single-player titles.
Creating balanced presets
Building custom graphics presets for different scenarios maximizes both visual quality and performance across your game library.
Competitive gaming presets prioritize frame rate and clarity over visual effects. Disable shadows or set them to low. Turn off anti-aliasing or use FXAA. Disable all post-processing effects except essential ones. Maximize frame rate to reduce input lag and ensure smooth performance during intense action.
Immersive single-player presets balance visual quality with acceptable frame rates. Enable medium to high shadows for depth perception. Use TAA for clean edges. Enable ambient occlusion for better depth. Include volumetric lighting on low or medium for atmosphere. Target 60-90 FPS rather than 144+ since competitive response time matters less.
Screenshot and content creation presets maximize visual fidelity regardless of performance. Max out all settings including ray tracing if available. Enable highest quality anti-aliasing. Use ultra textures and effects. Frame rates can drop to 30-40 FPS for screenshot sessions since you’re not actively playing.
Per-game optimization recognizes that optimal settings vary by title. Fast-paced shooters need maximum frame rates. Open-world adventures benefit from draw distance. Horror games require atmospheric effects. Racing games prioritize reflection quality. Customize settings for each game’s specific requirements rather than using universal presets.
Testing methodology ensures your balanced preset actually works. Play for 30 minutes rather than just checking benchmark results. Action sequences stress performance differently than benchmarks. Verify frame rates stay above your minimum acceptable threshold during demanding scenes.
Visual quality balance is personal rather than universal. Competitive players sacrifice visual fidelity for maximum performance. Screenshot enthusiasts accept lower frame rates for stunning visuals. Most players land somewhere between these extremes, seeking the best visual experience their hardware can maintain at acceptable frame rates.
Start with medium preset as a baseline, then adjust settings individually based on their visual impact and performance cost. Prioritize settings that enhance your specific gaming experience. Shadows matter for single-player immersion but hurt competitive visibility. Reflections enhance atmosphere but rarely affect gameplay.
Resolution represents the most important single setting. If your system struggles to maintain target frame rates, reduce resolution before lowering other settings. Modern upscaling technologies make resolution reduction less visually impactful than in the past. DLSS and FSR quality modes provide near-native image quality at substantially lower rendering costs.
Regular optimization maintenance keeps your graphics settings optimal. New GPU drivers sometimes improve performance with specific settings. Game patches can change how settings impact performance. Hardware upgrades open opportunities to enable previously too-expensive effects. Revisit your balanced presets periodically rather than setting them once and forgetting them.
Understanding the tradeoffs lets you make informed decisions rather than blindly following preset recommendations. Every system and player has different needs. Build configurations that enhance your gaming experience rather than chasing arbitrary quality or performance targets that don’t align with your actual preferences.